DigitalOcean Spaces
Better Messages can keep the files members send in a DigitalOcean Spaces bucket instead of your server's uploads folder. Browsers upload files straight to the bucket, and files open from the bucket instead of from your server.
Cloud storage works in the free version and in the WebSocket version, from Better Messages 3.1. Spaces is connected through the Amazon S3 or S3-compatible storage.
What you need#
- A DigitalOcean account with a Spaces subscription. DigitalOcean shows its price before it creates your first bucket, and one subscription covers all your buckets.
- A bucket, kept private for members-only files.
- A Spaces access key with Limited Access to that bucket.
Choose how files open#
| How files open | Who can open a file | What the bucket needs |
|---|---|---|
| Members of the conversation only (default) | Only members, through links Better Messages signs for each of them | A private bucket |
| Anyone with the link | Anyone who has a file's link | A bucket of its own with the CDN on, optionally on your own subdomain |
1. Create the bucket#
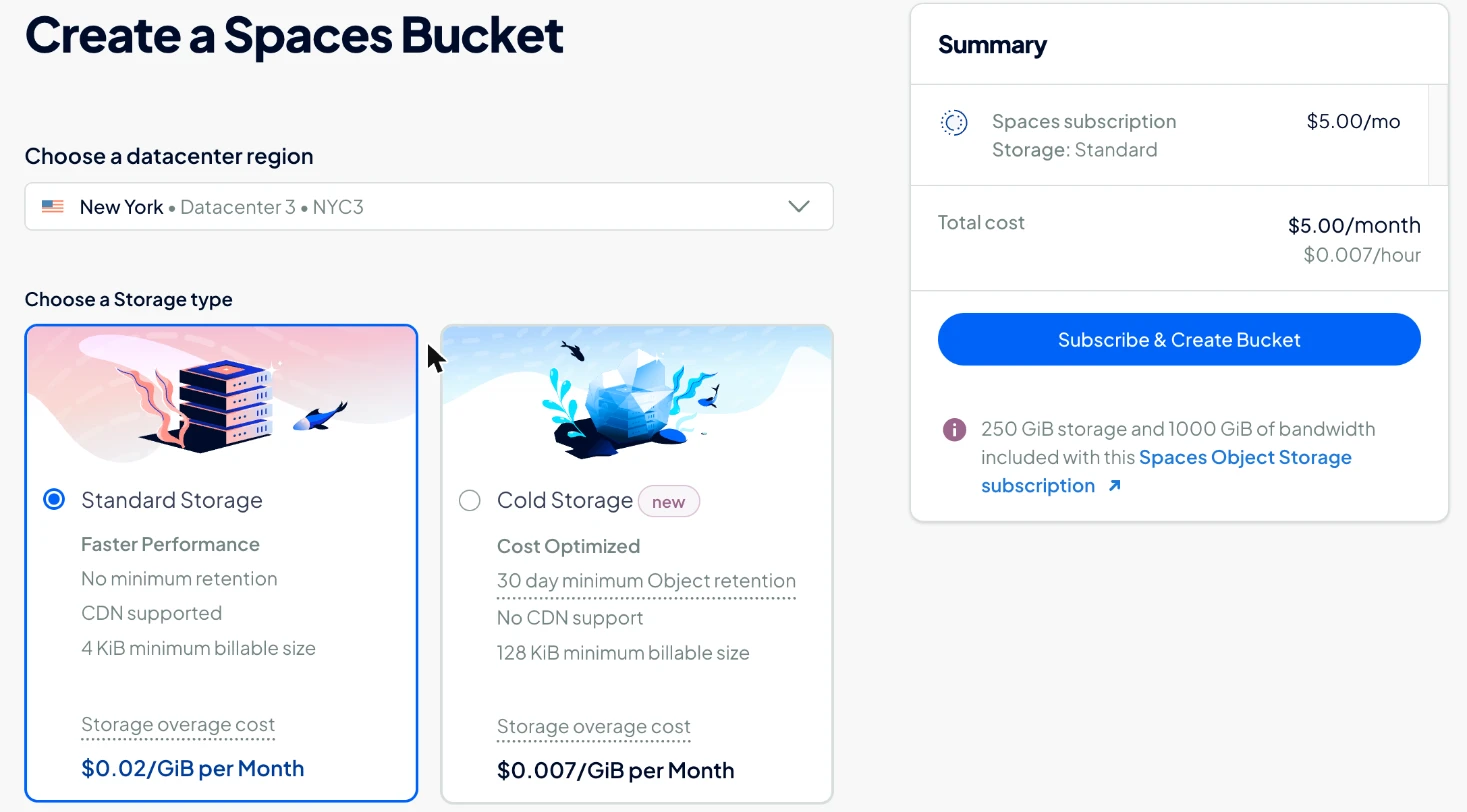
In the DigitalOcean control panel, open Spaces Object Storage and click Create Bucket. Choose a datacenter region close to most of your members and Standard Storage. Leave Enable CDN off for members-only files, enter a bucket name and click Create a Spaces Bucket (Subscribe & Create Bucket for your first one).
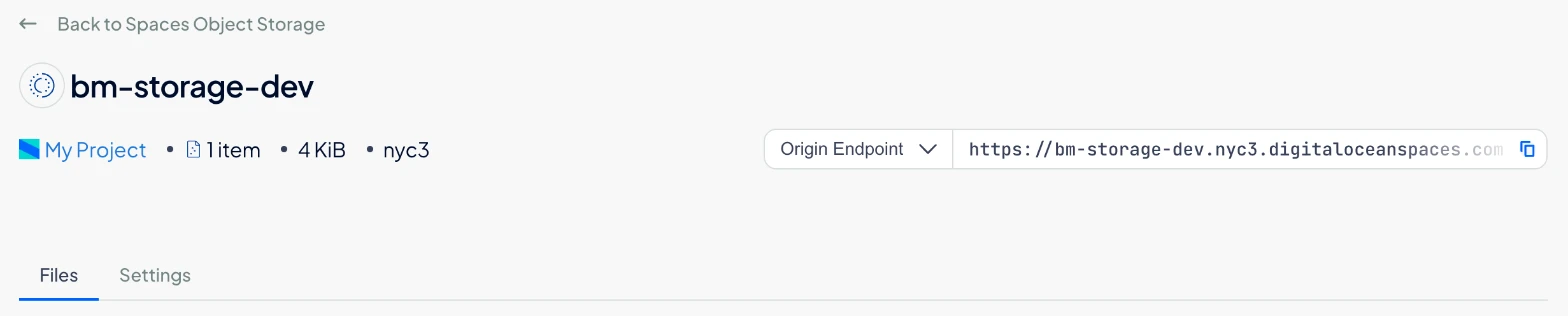
The bucket's page shows its Origin Endpoint, for example https://my-site-chat-files.nyc3.digitaloceanspaces.com. The part after the bucket name is the region, nyc3 here.

2. Create an access key#
Open Spaces Object Storage → Access Keys and click Create Access Key:
- Choose Limited Access.
- Tick the new bucket and give it Read/Write/Delete.
- Name the key, for example
better-messages.

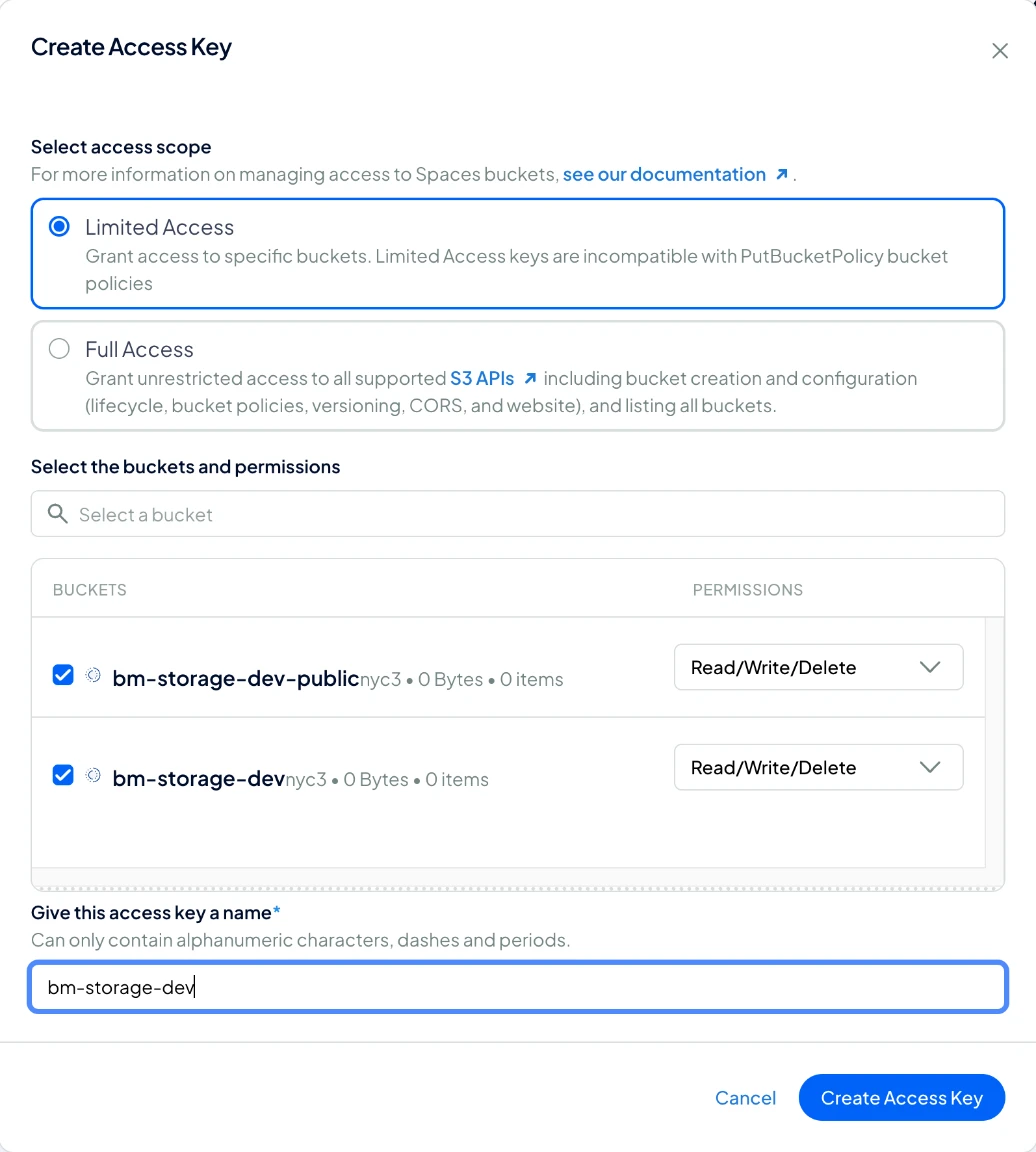
Click Create Access Key. Copy the Access Key ID and the Secret Key: DigitalOcean shows the secret only once.
A Limited Access key cannot change the bucket's CORS rule, so the next step adds it by hand. A Full Access key could, but it opens every bucket of the account, so keep the limited one.
3. Add the CORS rule#
Open the bucket's Settings tab and click Add under CORS Configurations:
- Origin: your site's address, for example
https://my-site.com. - Allowed Methods: GET, PUT and HEAD.
- Allowed Headers: click Add Header and enter
*. - Access Control Max Age:
3600.

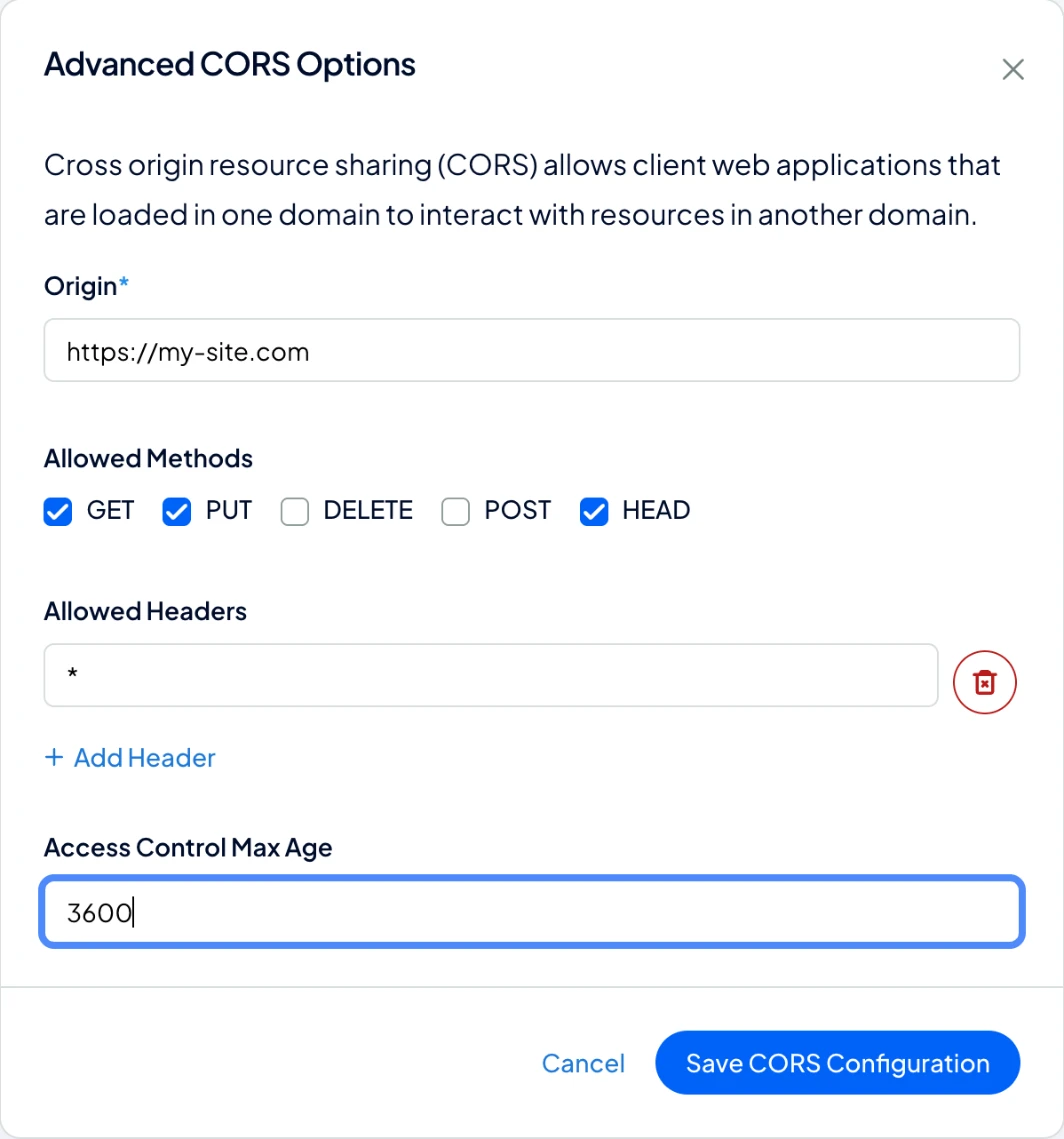
Click Save CORS Configuration. A rule holds one origin, so if you use the Better Messages mobile app, add two more rules the same way, with capacitor://localhost and https://localhost as the origin.
4. Connect the bucket in Better Messages#
In WordPress, go to Better Messages → Settings → Attachments. In the Storage section, click Connect next to Amazon S3 or S3-compatible, and fill in:
- Endpoint:
https://<region>.digitaloceanspaces.com, for examplehttps://nyc3.digitaloceanspaces.com. Leave the bucket name out of it. - Region: the region, for example
nyc3. - Bucket: the bucket's name.
- Folder: where in the bucket this site keeps its files,
bmby default. Give each site its own folder if several sites share one bucket. - Access Key ID and Secret Access Key, from step 2.
Leave Path-style URLs on and click Test Connection. Every line should say Passed.

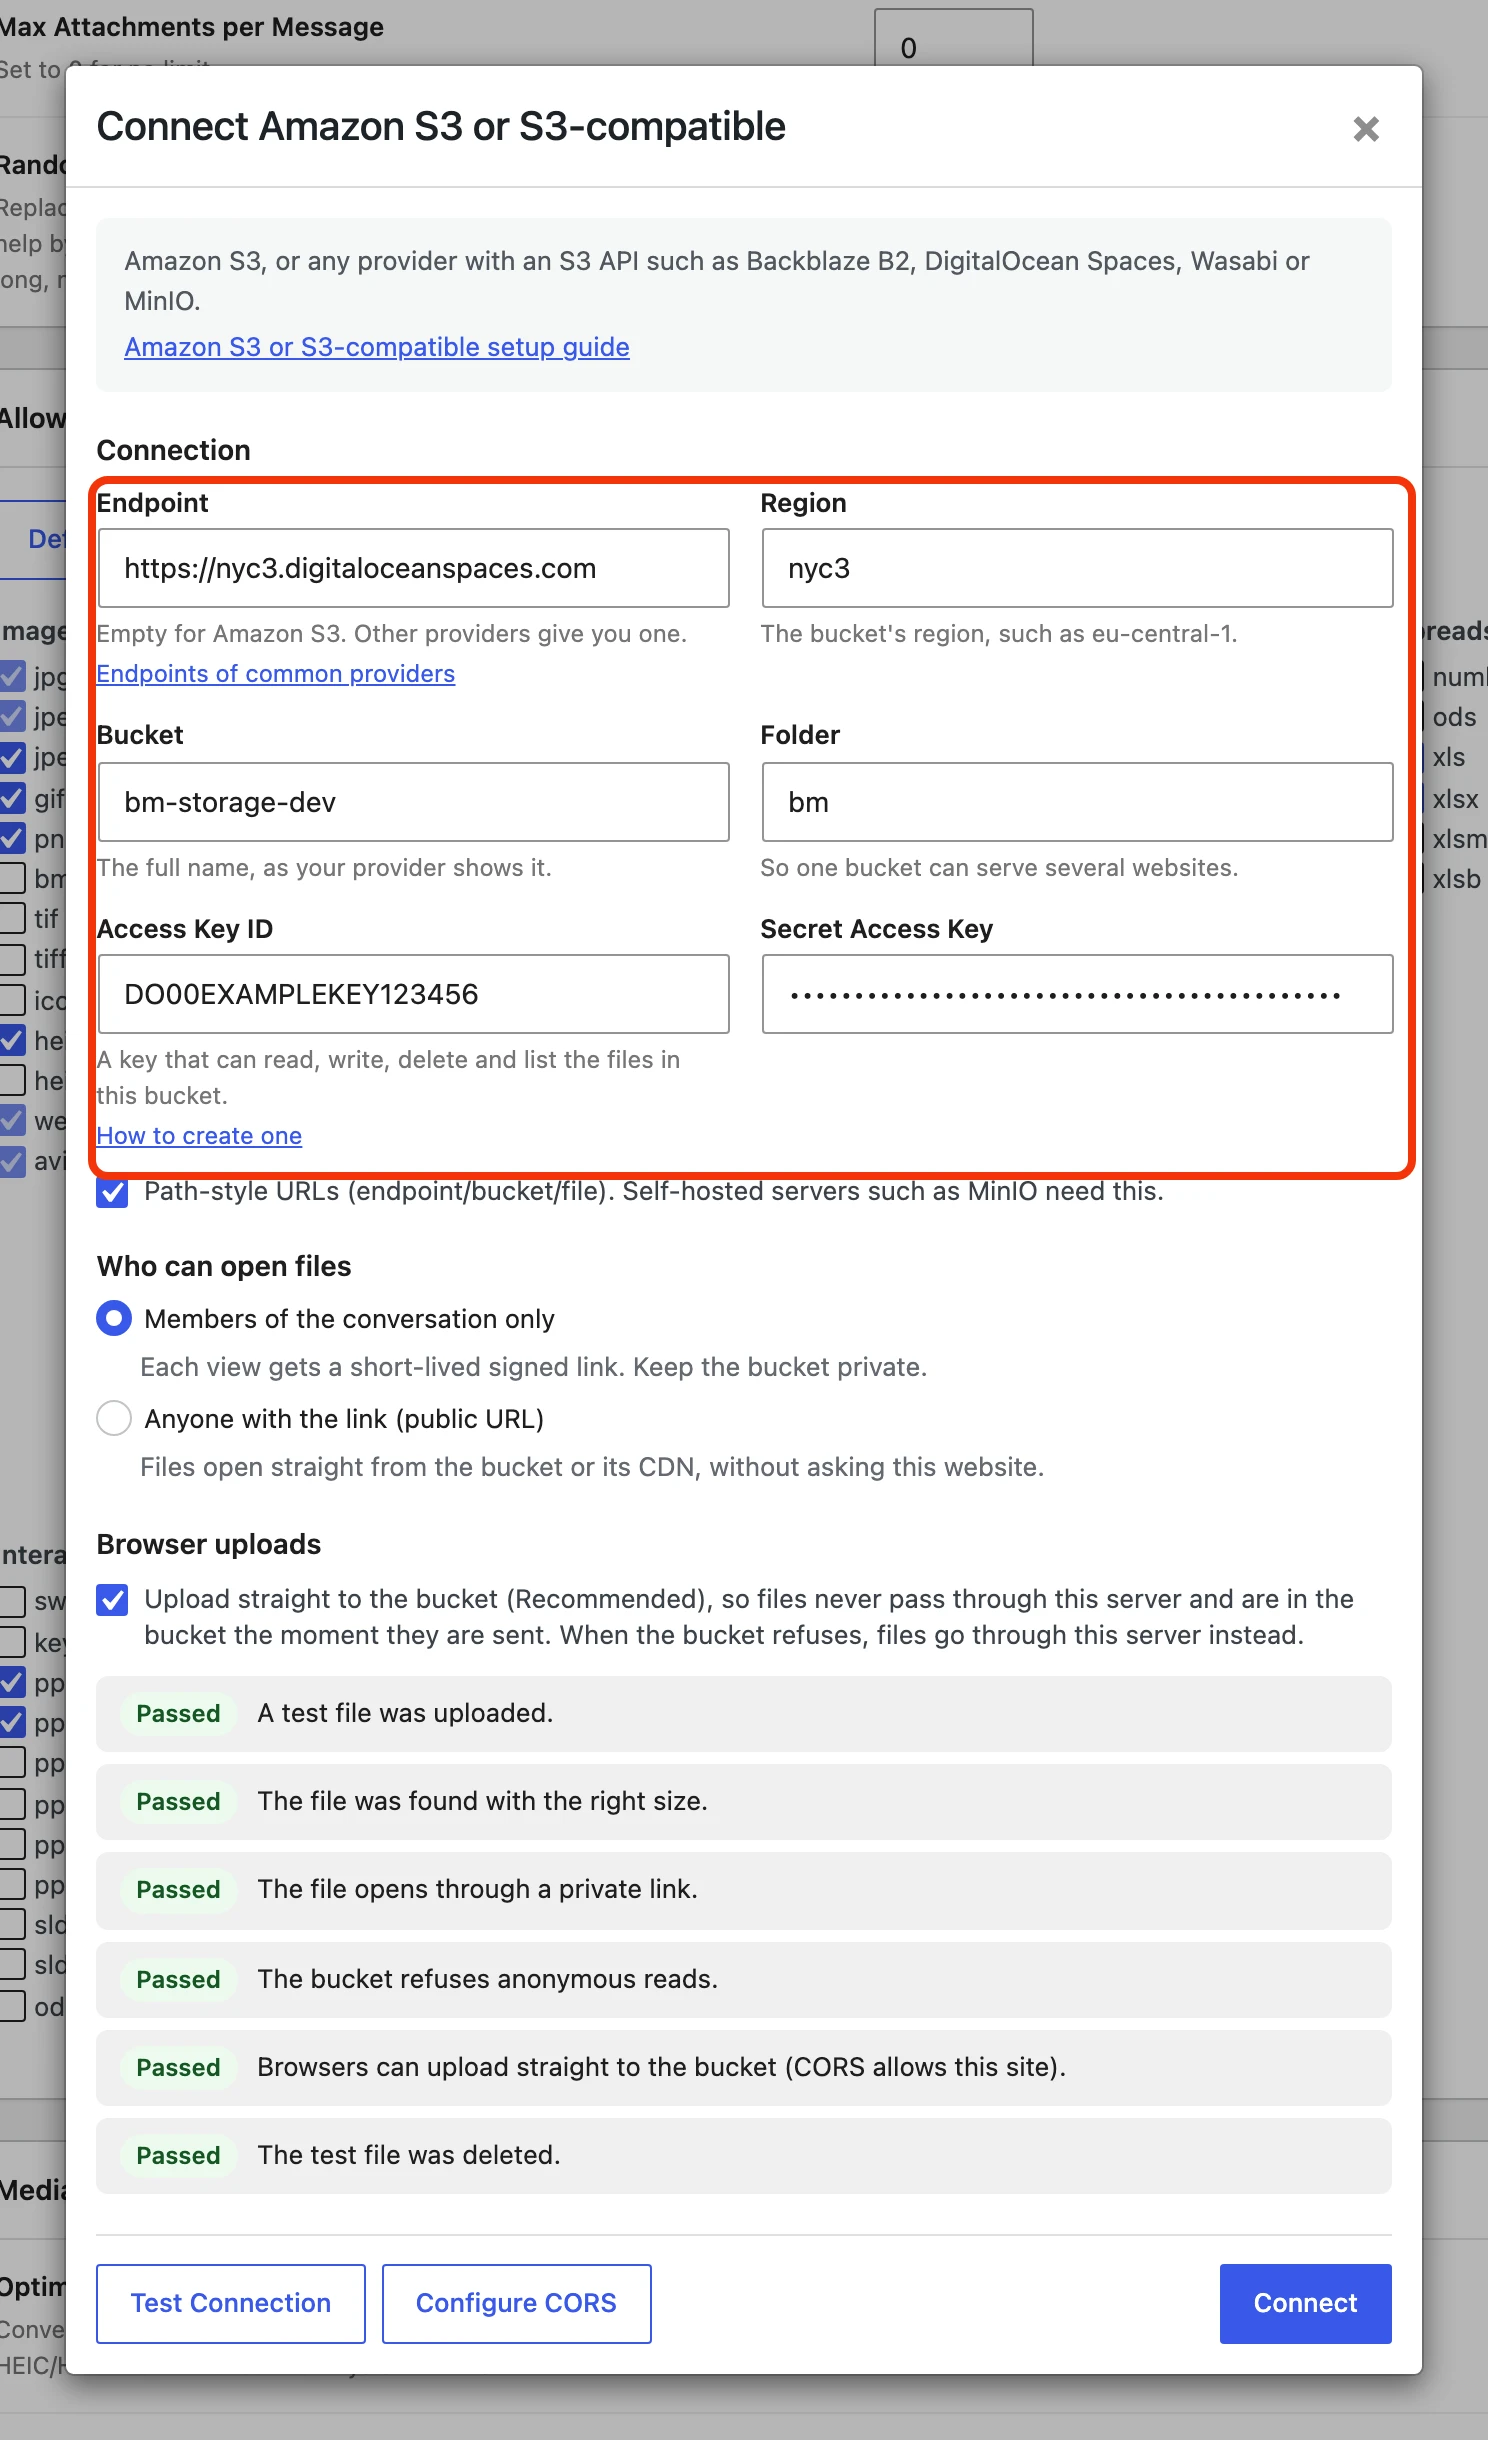
Configure CORS says the key is not allowed to change the bucket's CORS: that is expected with a Limited Access key, and the rule from step 3 does the job.
Click Connect. It runs the same test and saves the storage when the test passes. When a check fails, nothing is saved: fix what the check says, or click Save Anyway.
5. Choose which files go to the bucket#
Under File Groups, choose Amazon S3 or S3-compatible for each kind of file you want in Spaces, then click Save Settings. The choice applies to files sent after you save. Files in end-to-end encrypted conversations stay encrypted wherever they are kept.
Who can open files#
Members of the conversation only#
This is the default. The bucket stays private, and every member gets links to the files that Better Messages signs for them. A link works for one to one and a half days, and the messenger renews links on its own while the member keeps the conversation open. Someone who is not a member of the conversation gets no link, and without one the bucket opens nothing.
Anyone with the link#
Files open from a public address with no check: anyone who has a file's link can open it, and your site does no work when a file is viewed. Use this only for files that are not private, and keep them in a bucket of their own.
Spaces makes files public one by one, as they are uploaded. Create a bucket for public files with Enable CDN on, give the access key Read/Write/Delete on it and add the CORS rule from step 3 to it. In Better Messages:
- Choose Anyone with the link (public URL).
- Tick Upload each file as public-read.
- Enter the bucket's CDN address as the Public URL:
https://<bucket>.<region>.cdn.digitaloceanspaces.com, for examplehttps://my-site-public-files.nyc3.cdn.digitaloceanspaces.com.
Test Connection checks that a file opens from it. The CDN keeps a copy of each file for the Edge Cache TTL set in the bucket's CDN settings, one hour by default, and a deleted file can keep opening from the CDN until then. Purge CDN Cache in the same menu clears it at once.
Public files on your own subdomain#
The Spaces CDN can serve the bucket from a subdomain of yours, such as files.my-site.com. Open the bucket's Settings, click Change → Edit CDN Settings next to CDN, then Add a New Subdomain.

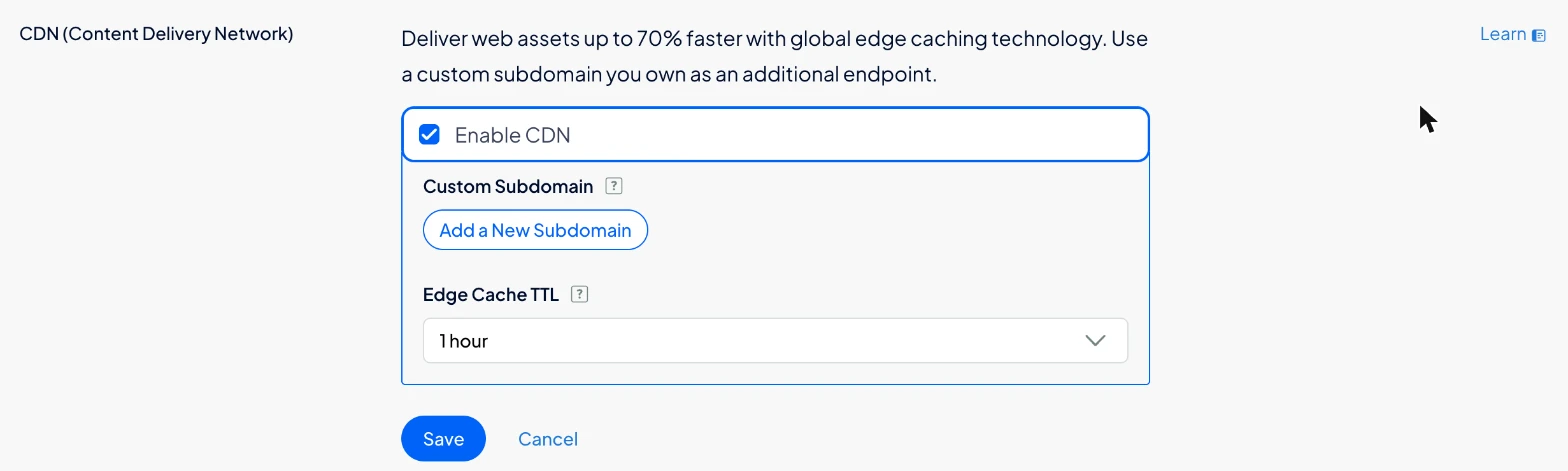
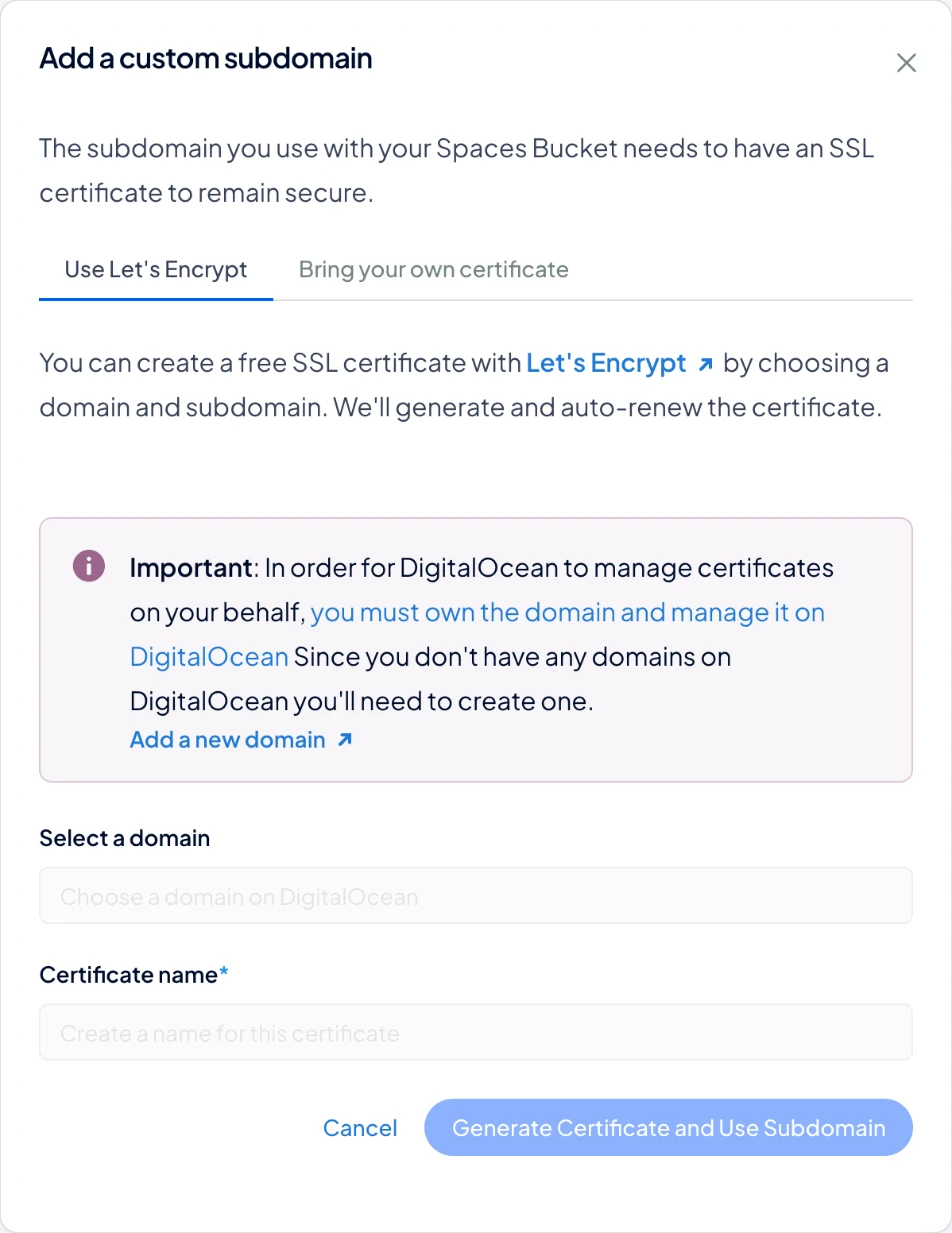
The subdomain needs a certificate:
- Use Let's Encrypt: DigitalOcean creates and renews a free certificate, but only for a domain whose DNS is managed at DigitalOcean. Choose the domain, enter the subdomain and click Generate Certificate and Use Subdomain. DigitalOcean adds the DNS record itself.
- Bring your own certificate: for a domain whose DNS is elsewhere. Upload a certificate for the subdomain, then add a CNAME record for it at your DNS provider, pointing to
<bucket>.<region>.cdn.digitaloceanspaces.com. Upload a new certificate before this one expires.

Enter https://files.my-site.com as the Public URL in Better Messages.
Uploads straight to the bucket#
With Upload straight to the bucket on, the default, a member's browser or the mobile app sends a file straight to the bucket, using a link Better Messages signs for that one file. Files never pass through your server, and large files are sent in parts.
While the bucket does not allow uploads from your site, files go through your server instead, so sending never fails because of CORS. With Upload straight to the bucket off, every file is uploaded to your server first and copied to the bucket after its message is sent.
The CORS rule from step 3 also lets members open files in end-to-end encrypted conversations. The messenger downloads such a file itself to decrypt it, and without the rule the browser refuses and shows Could not download media. So keep the rule even with Upload straight to the bucket off. With encryption on, Test Connection checks this too. The mobile app is not affected.
Moving files you already have#
Files sent before you connected the bucket stay where they are and keep opening. To move them, click Move all files from one storage to another under File Groups, or move single files in Better Messages → Administration → Files. Moves run in the background, so you can leave the page while they run.
When a file is deleted#
When a file is deleted in Better Messages, it is marked Pending deletion in Administration → Files, and a background job deletes it from the bucket within a few minutes. The file leaves the list once the bucket confirms it is gone. If the bucket refuses, the job tries again later.
Keeping the keys out of the database#
You can put the keys in wp-config.php instead of the settings. The dialog then shows those fields as set in wp-config.php.
define( 'WORDPLUS_S3_ACCESS_KEY', 'your-access-key-id' );
define( 'WORDPLUS_S3_SECRET_KEY', 'your-secret-key' );
Troubleshooting#
"The provider does not recognise this access key." The Access Key ID is wrong, or the key was deleted.
"The secret key does not match the access key." The Secret Access Key does not belong to that Access Key ID. If it was not copied when the key was created, create a new key.
"The key is not allowed to do this in the bucket." The key has no access to this bucket, or only Read. In Access Keys, open the key's ⋯ menu, choose Edit Permissions and give the bucket Read/Write/Delete.
"The bucket does not exist at this endpoint." Check the bucket's name, and that the endpoint is the bucket's region without the bucket name in it.
"The key is not allowed to change the bucket's CORS." Expected with a Limited Access key. Add the CORS rule in the bucket's settings, see step 3.
"CORS does not allow uploads from … yet." The bucket's CORS rules do not include that address. Add a rule for it, see step 3.
"Encrypted files will not open in browsers on …" The bucket's CORS rules do not include that address. Add a rule for it, see step 3.
"The file does not open from its public URL." Check the Public URL, that the bucket's CDN is on and that Upload each file as public-read is ticked.
"This server's clock is … seconds off the provider's." Signed links stop working when your server's clock is more than 15 minutes off. Ask your host to fix the server time.