Native Android Messenger App for WordPress
Android application feature allows you to generate native Android messenger application for your website, which allows you to send push and call notifications and can be published to the Google Play Market.
The Overview tab#
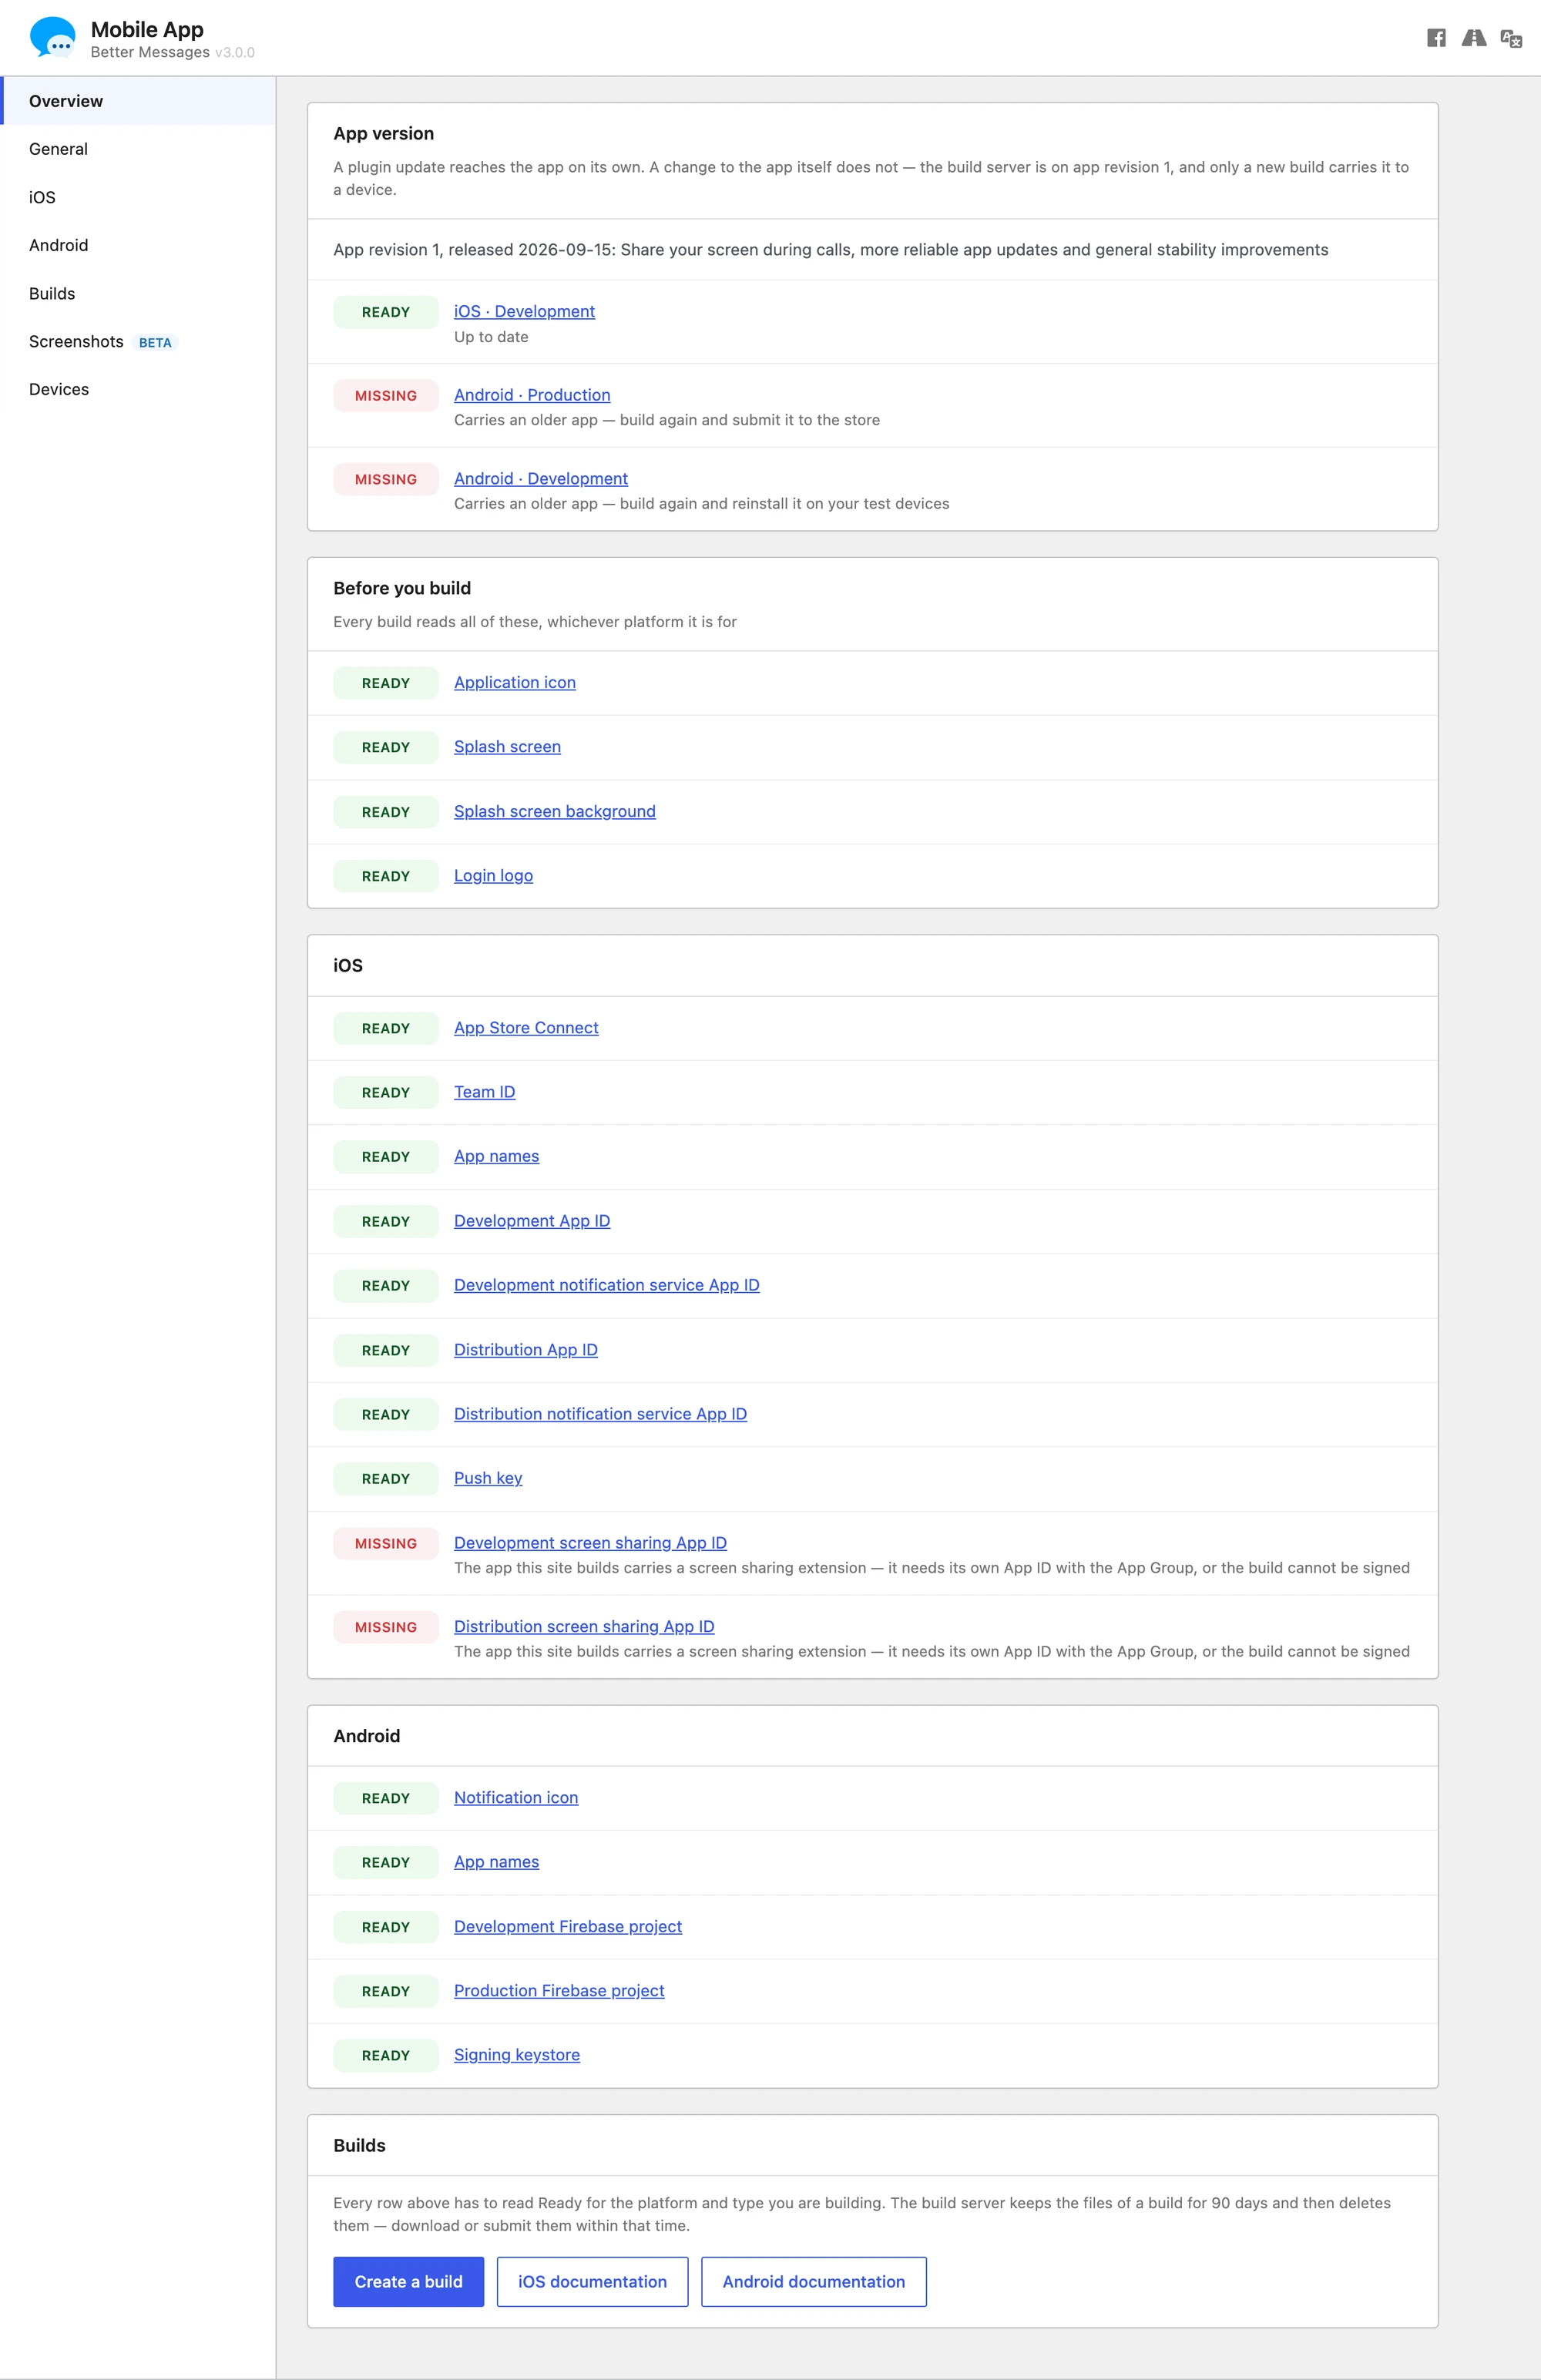
Better Messages → Mobile App → Overview checks everything below for you, so you can see what a build still needs before starting one rather than reading it out of a failure.
Each row reads Ready or Missing, and its label links straight to the field that sets it. A missing row explains what it is for rather than only naming the gap.
The tab is grouped as:
- App version — which app revision the build server is on, and whether each platform and build type is carrying it. A plugin update reaches the installed app on its own. A change to the app itself does not, so a row here reading Carries an older app means you need to build again and reinstall it on your test devices, or submit it to the store.
- Before you build — what every build reads, whichever platform it is for: application icon, splash screen, splash screen background, login logo.
- Android — notification icon, app names, the development and production Firebase projects, and the signing keystore. All of them are covered below.
- iOS — the same for the iOS app.
- Builds — a shortcut to start one.
A build is ready to start when every row for the platform and type you are building reads Ready.

The build server keeps a build's files for 90 days and then deletes them — download or submit them within that time.
How an update reaches an installed app#
There are two separate paths, and only one of them goes through Google Play.
Plugin updates arrive on their own. The app carries the site's scripts, styles and settings rather than baking them in, so updating Better Messages on the site updates every installed copy. What the member sees depends on what changed:
| What the update changed | What the app does |
|---|---|
| Settings only | Applied live, in place. No prompt, no restart |
| Stylesheets | Swapped in immediately. No prompt |
| Application code | A notice reads "A new version of the application has been downloaded." with an Update now action that restarts the app into it |
Dismissing that notice costs nothing — the downloaded version is already stored, and it starts being used at the next launch whether the member tapped Update now or not.
App updates need the store. Anything built into the shell itself — the icon, the splash screen, the Firebase configuration, a Capacitor plugin, a native call or push change — only reaches members through a new build that you publish. Once per launch the app asks Google Play whether a newer build of itself is live. If one is, a notice reads "A new version of the app is available in Google Play." with an Update action that opens the store page. Dismissing it snoozes that particular version for 24 hours.
This is the same split the Overview tab's App version rows describe: a row reading Carries an older app means the published copy is behind, and no amount of updating the plugin will fix it.
Requirements#
-
Firebase Project#
To be able to generate and publish Android application, you need to have Firebase Project with enabled Firebase Cloud Messaging (FCM).
-
Play Market Developer Account (Production Only)#
To be able to publish Android application to the Google Play Market, you need to have Google Play Developer Account (25 USD one-time fee).
-
Android Device#
To be able to install and test an Android application, you need to have Android device.
App branding#
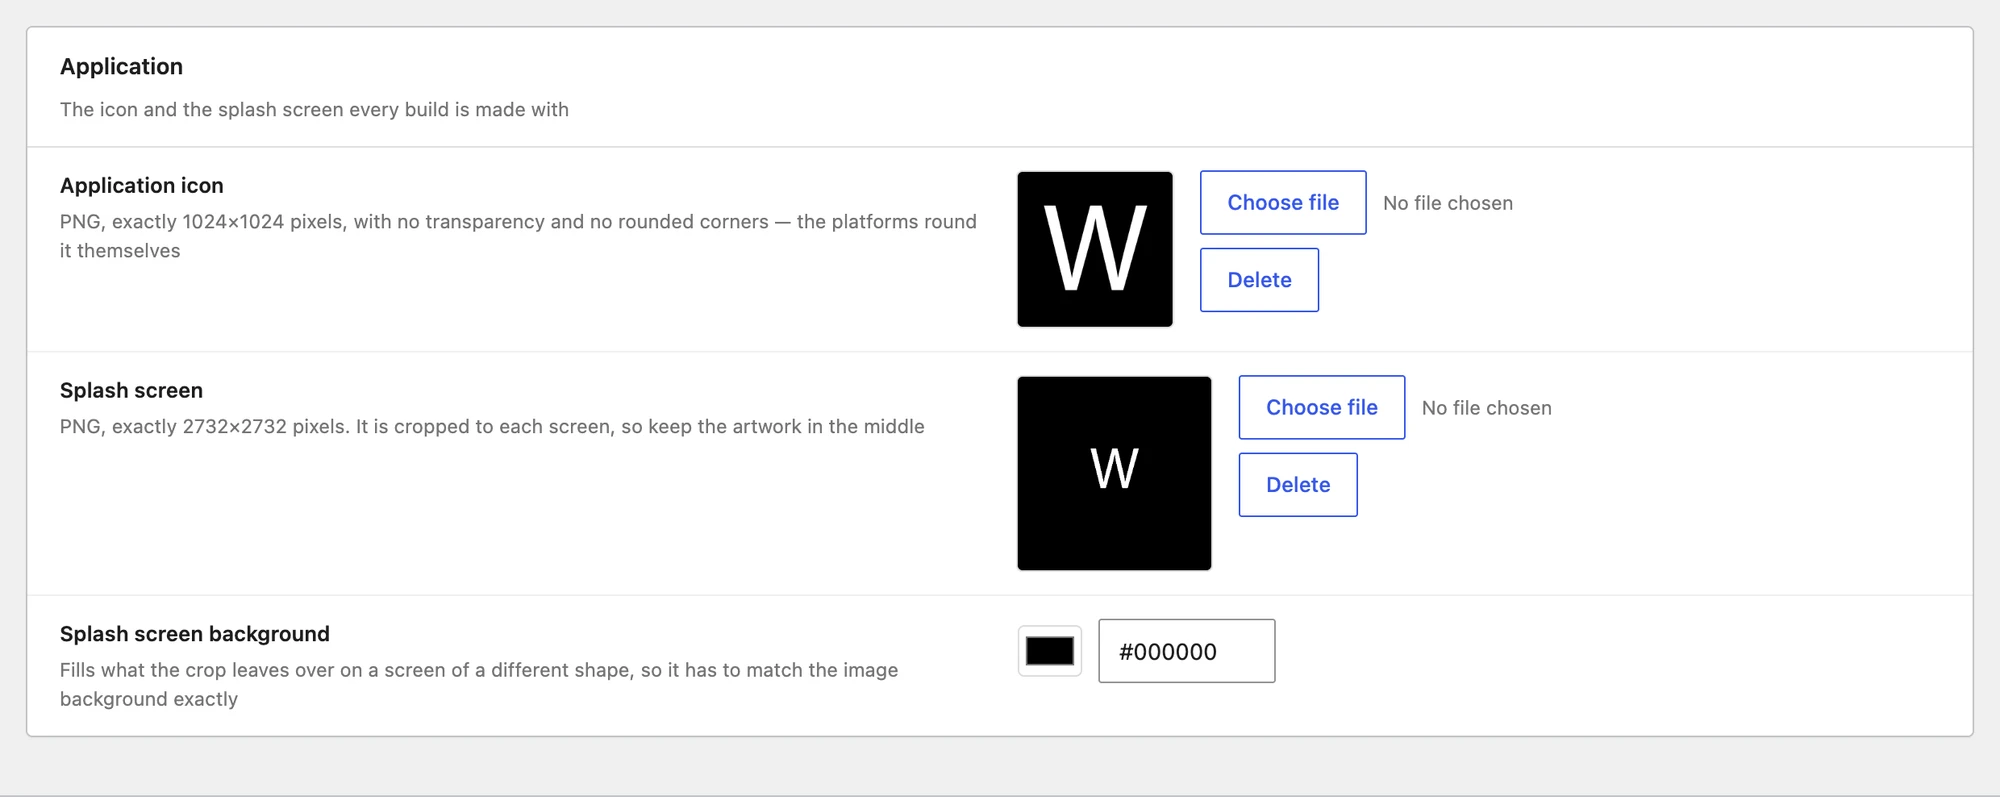
Better Messages → Mobile App → General holds the assets every build is made with, whichever platform it is for. These are the Before you build rows on the Overview tab.
Application#
| Field | Requirement |
|---|---|
| Application icon | PNG, exactly 1024×1024, no transparency and no rounded corners — the platforms round it themselves |
| Splash screen | PNG, exactly 2732×2732. It is cropped to each screen, so keep the artwork in the middle |
| Splash screen background | Fills what the crop leaves over on a screen of a different shape, so it has to match the image background exactly. A build needs it set even when the artwork fills the screen |

Login screen#
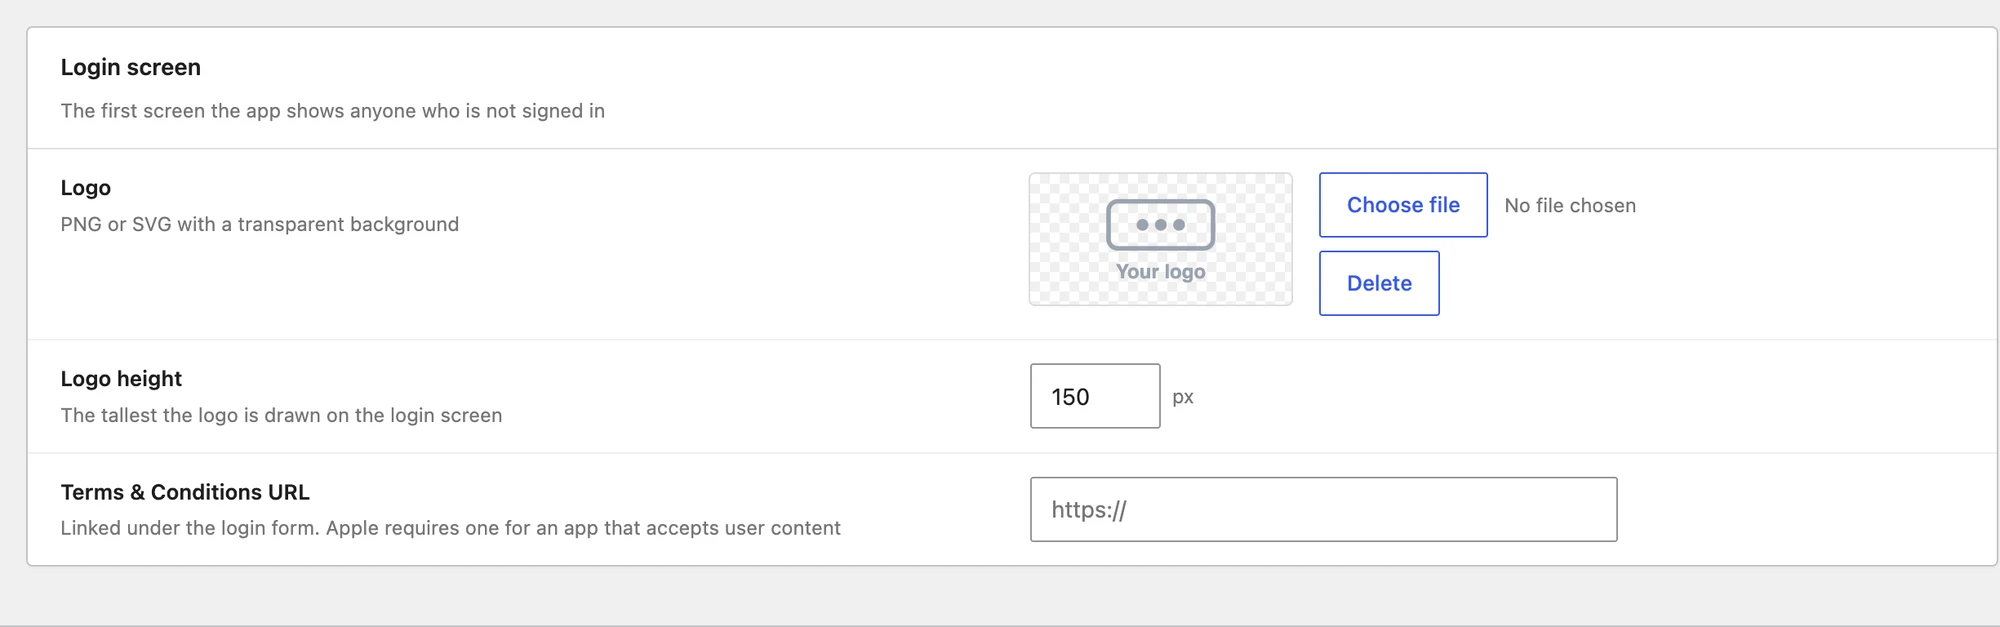
The first screen the app shows anyone who is not signed in.
| Field | Requirement |
|---|---|
| Logo | PNG or SVG with a transparent background |
| Logo height | The tallest the logo is drawn on the login screen |
| Terms & Conditions URL | Linked under the login form |

Android#
| Field | Requirement |
|---|---|
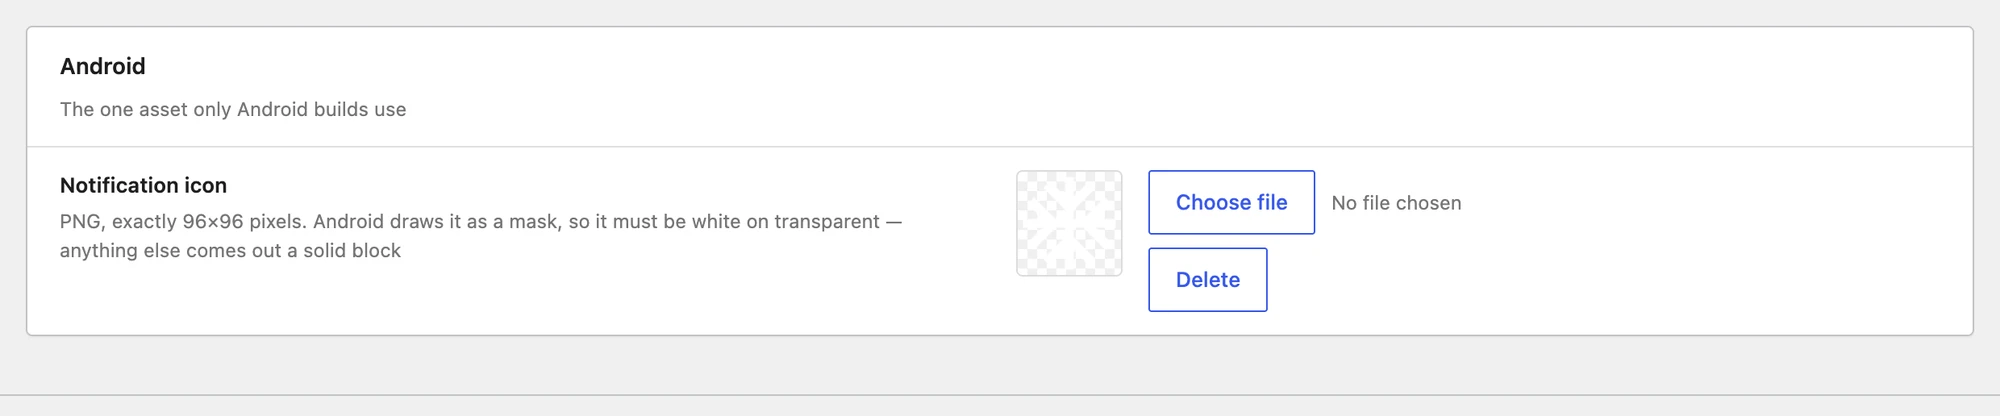
| Notification icon | PNG, exactly 96×96. Android draws it as a mask, so it must be white on transparent — anything else comes out a solid block |
This one is required by every Android build.

Create Firebase Project#
For building Android application, you need to create Firebase Project and enable Firebase Cloud Messaging (FCM) for it.
Follow these steps to create Firebase Project:
-
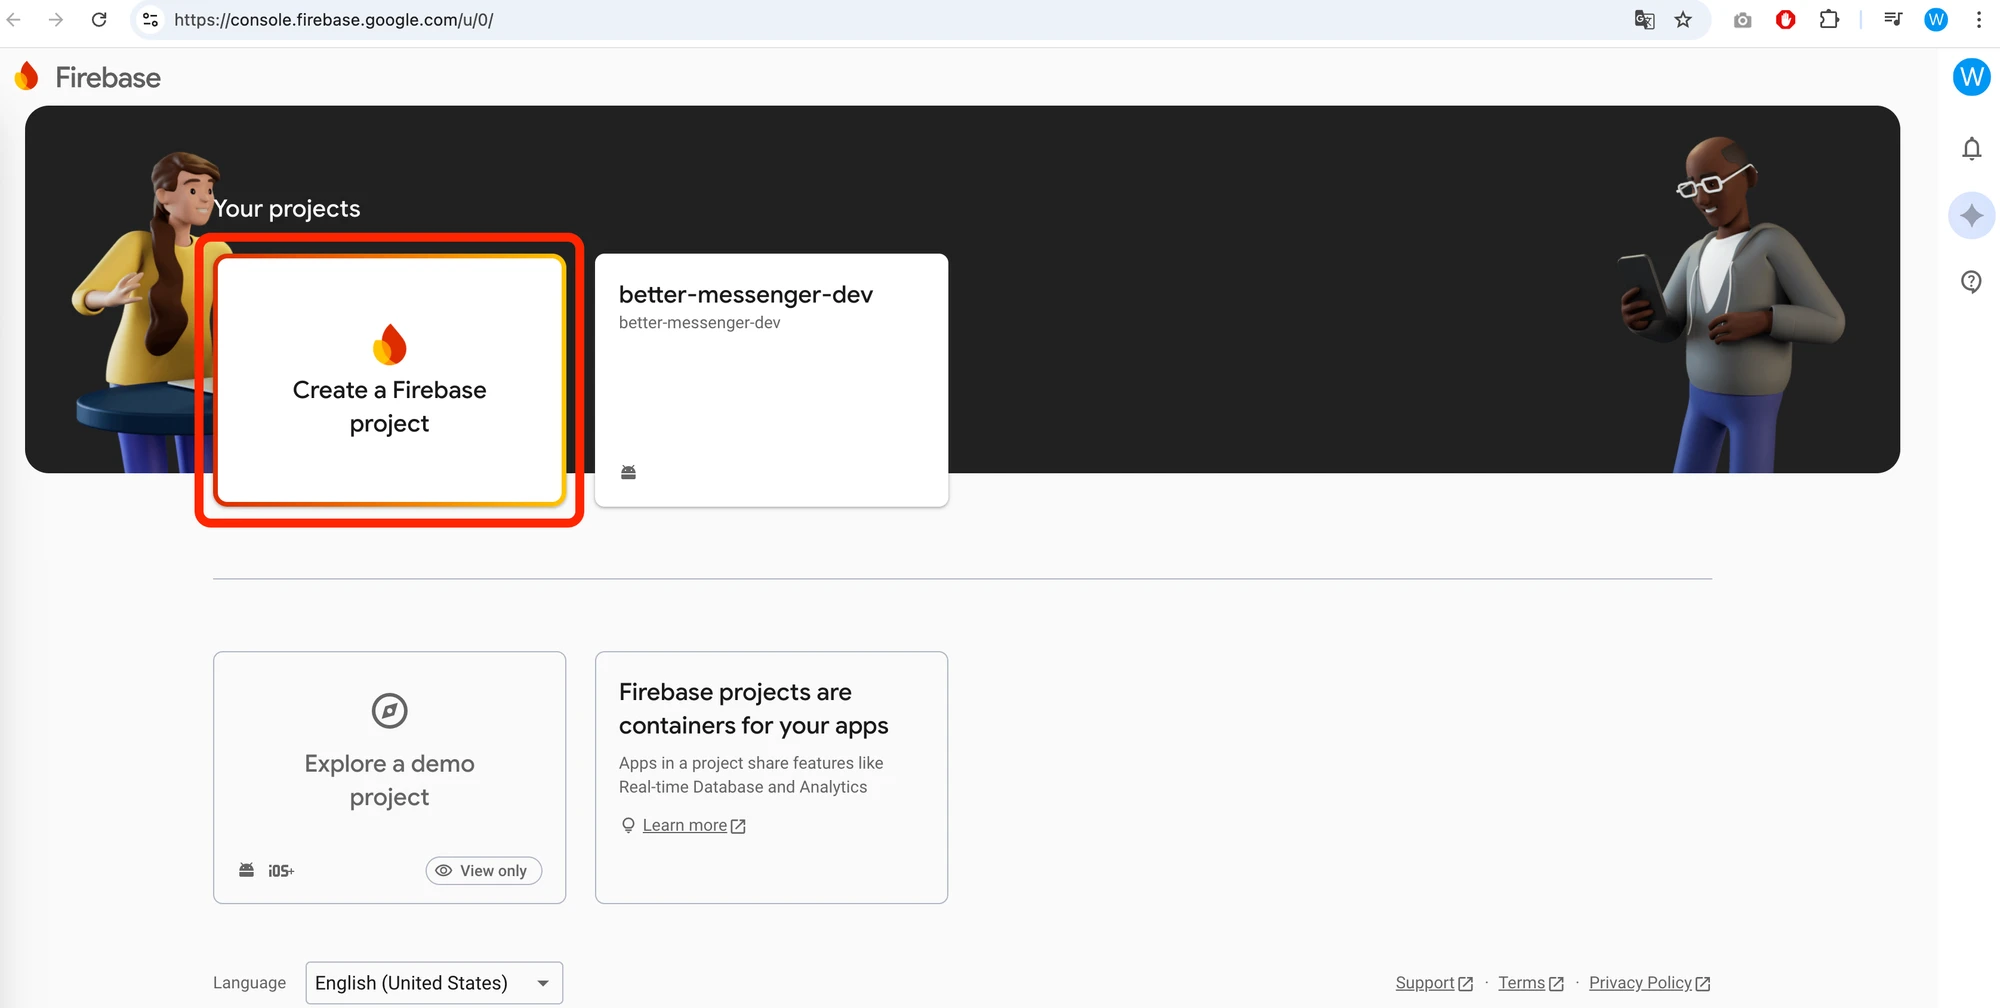
Go to Firebase Console and login with your Google Account.
-
Click on Create a Firebase Project button to create a new Firebase Project.
-
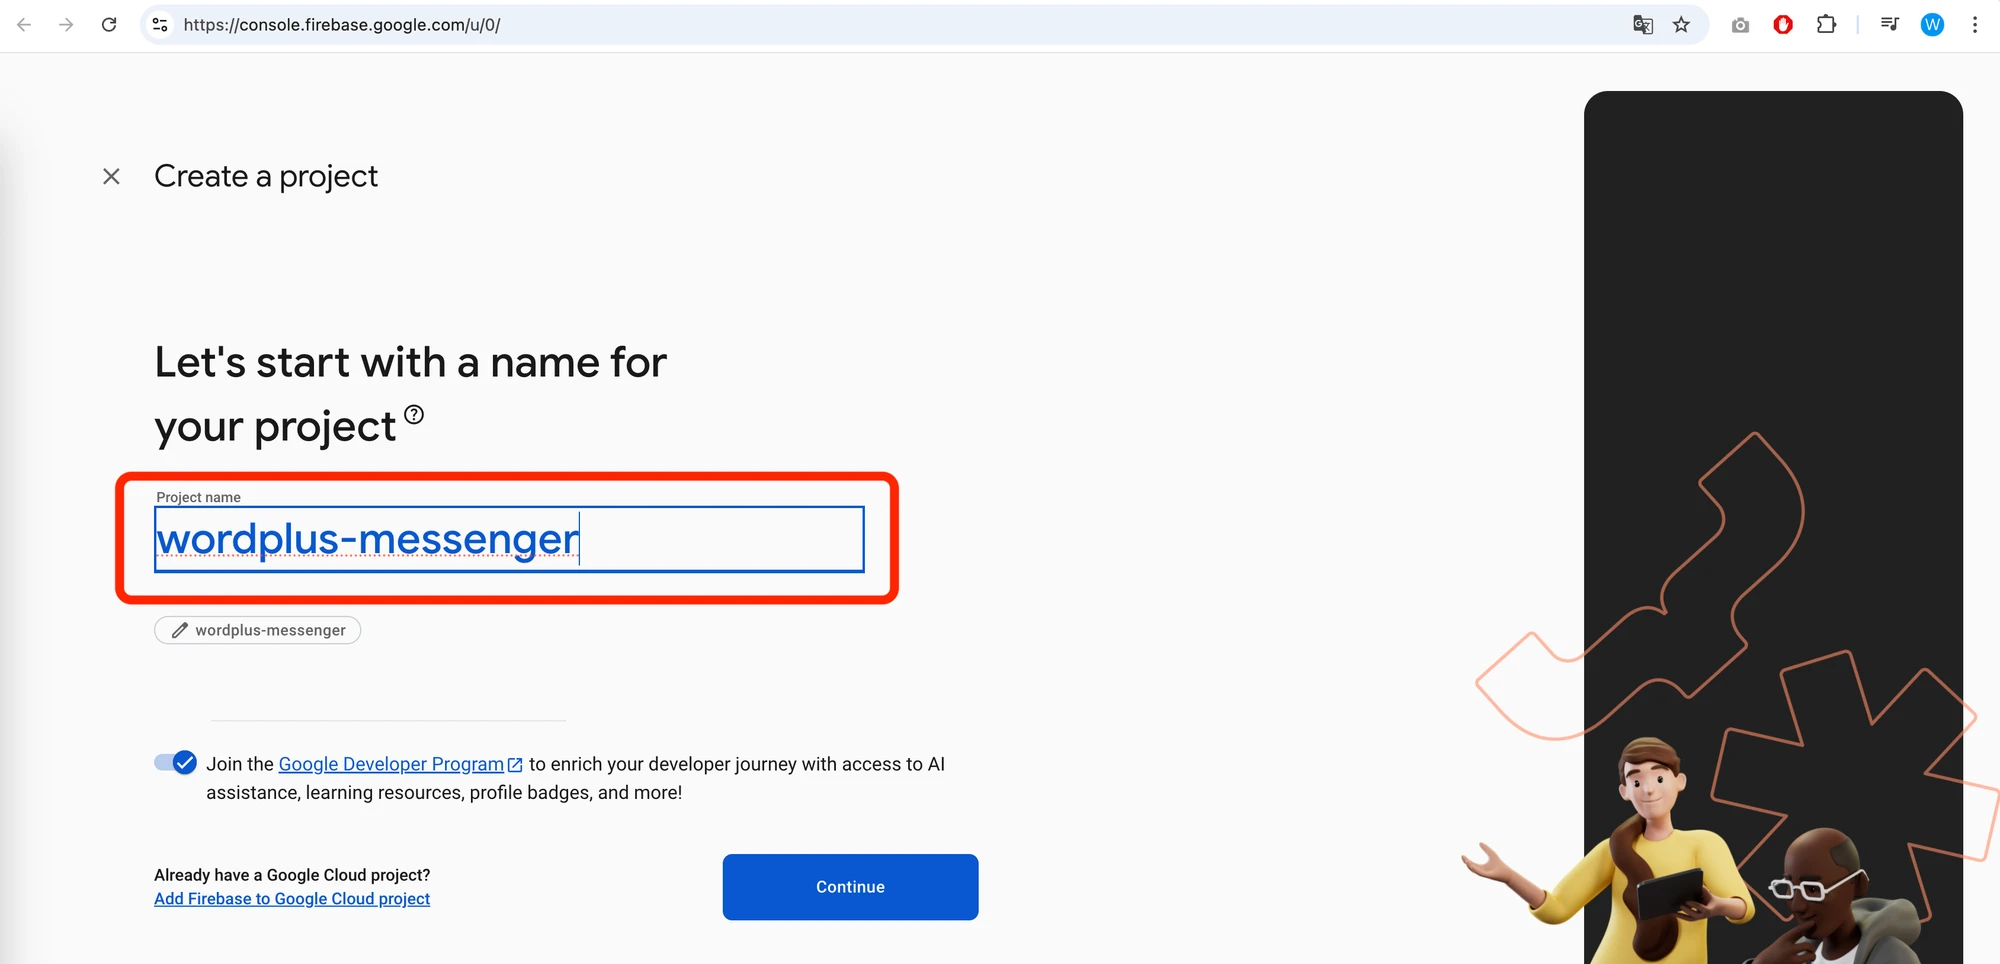
Enter your project name (for example
yourwebsite-messenger) and click on Continue button.Press continue until you reach the Project Overview page.
-
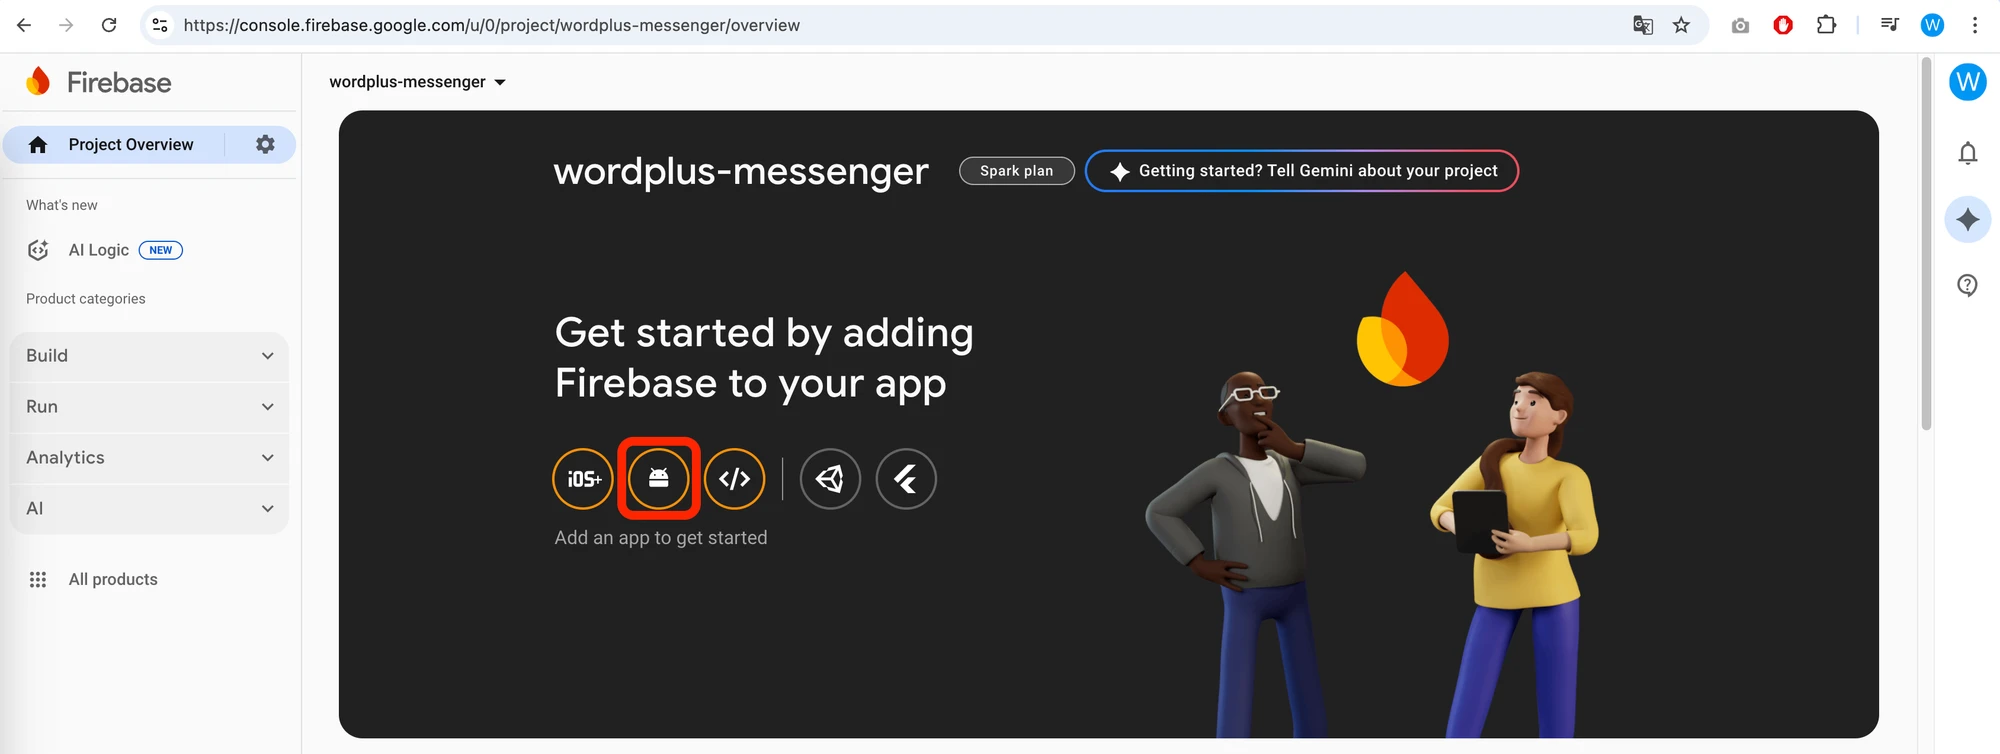
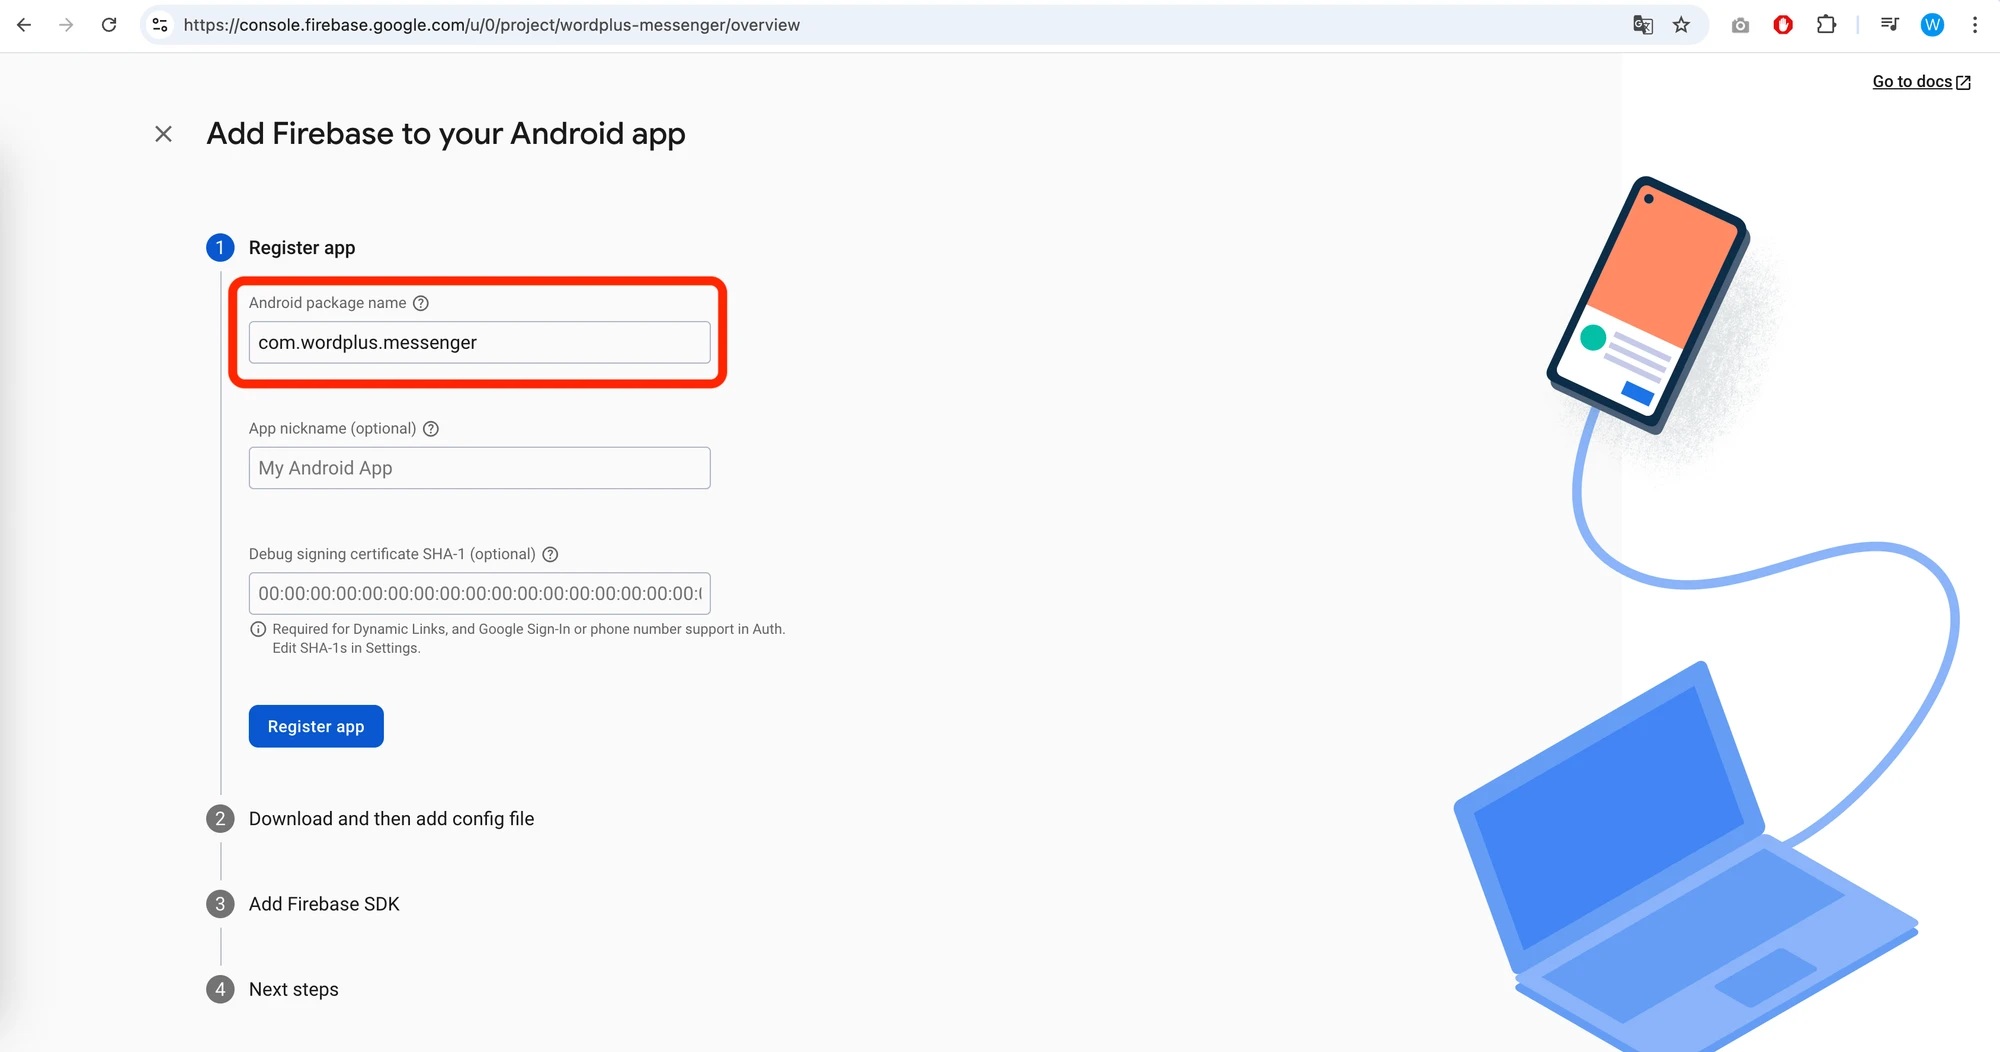
Click on the Add app button and select Android.
-
Enter your Android package name (for example
com.yourdomain.messenger), app nickname and SHA-1 certificate fingerprint are optional and not required to be filled and click on Register app button.The Android package name must be unique and should follow the reverse domain name notation (e.g.,
com.yourdomain.messenger).For development and production applications, you can use the same package name, but it is recommended to use different package names for development and production applications to avoid conflicts.
You can add one more Android package name for development purpose to the same Firebase Project or create a separated Firebase Project if you want to have a separate Firebase configuration for development and production applications.
-
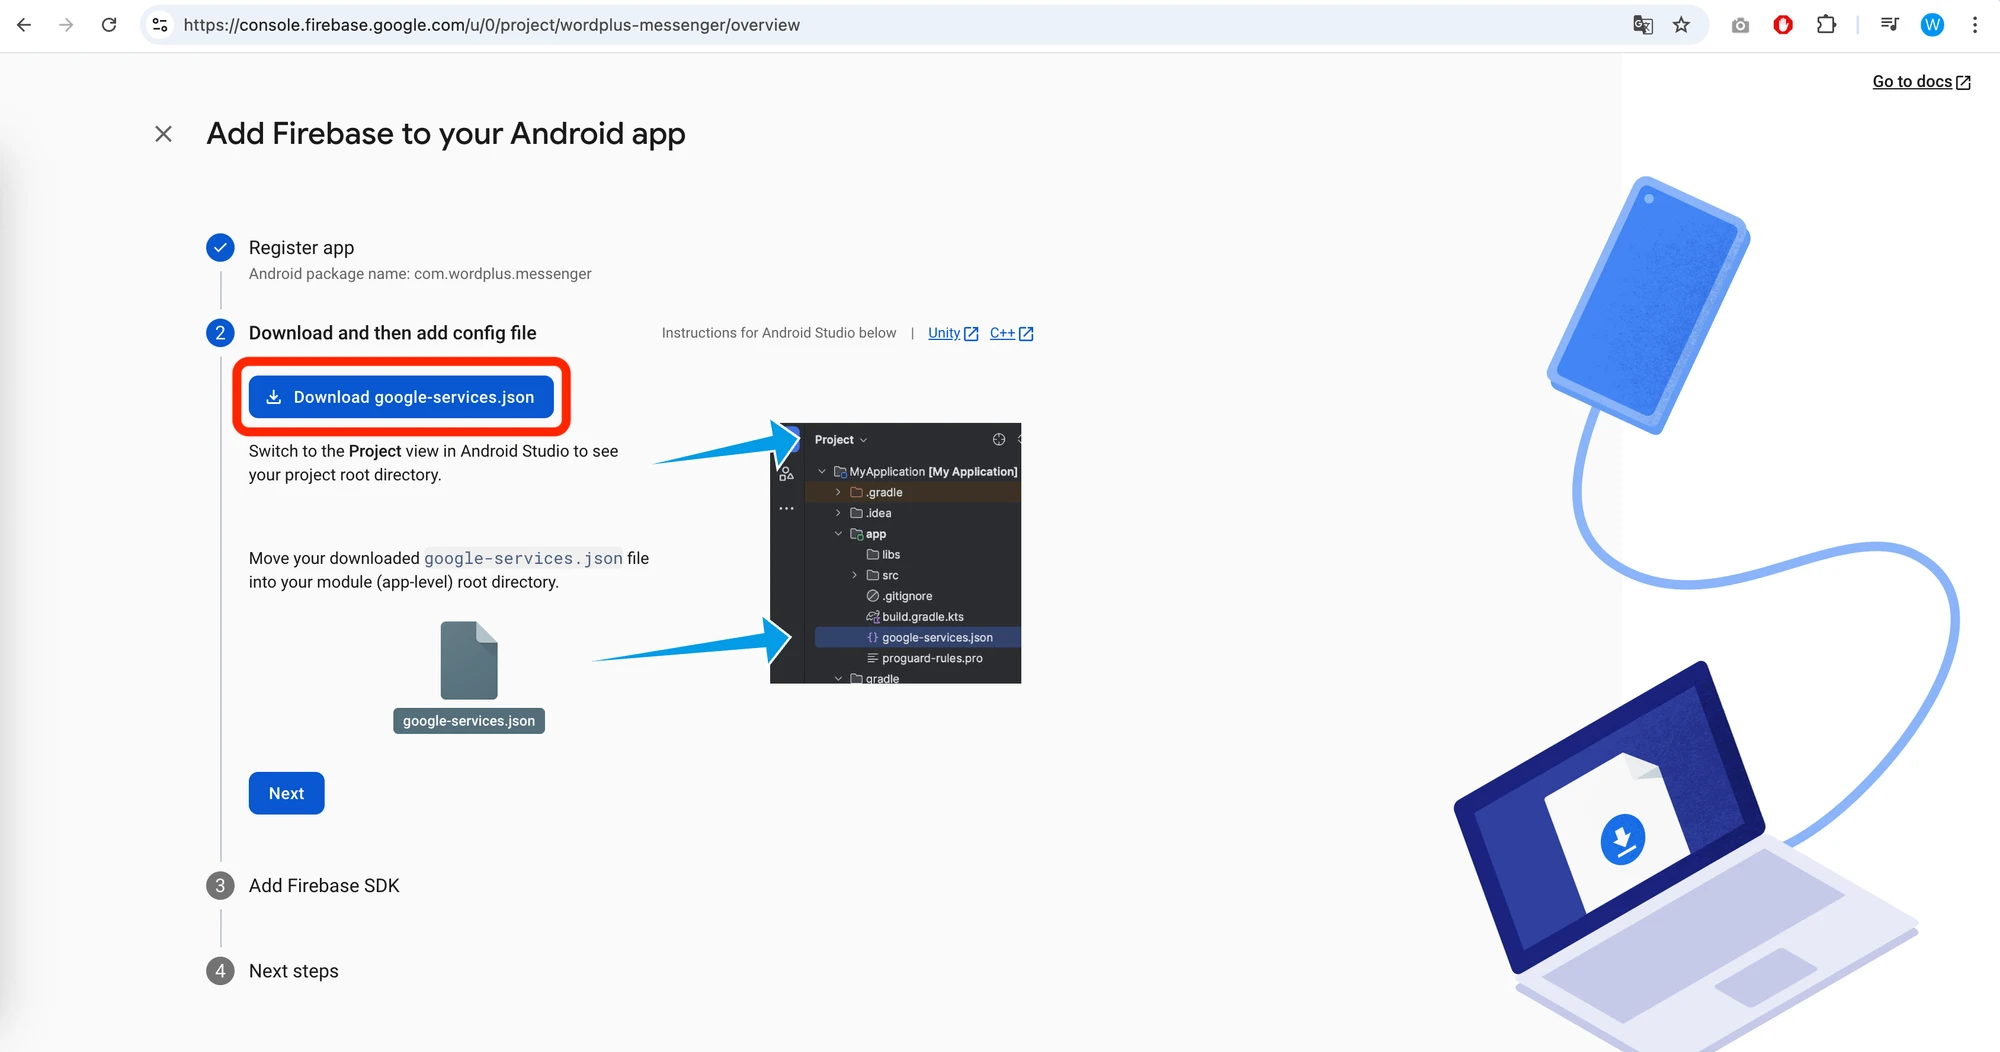
Download the
google-services.jsonfile and save it to your computer. You will need it later to configure the Android application build. -
Click on Next button and then on Continue to console button to finish the Firebase Project creation.
-
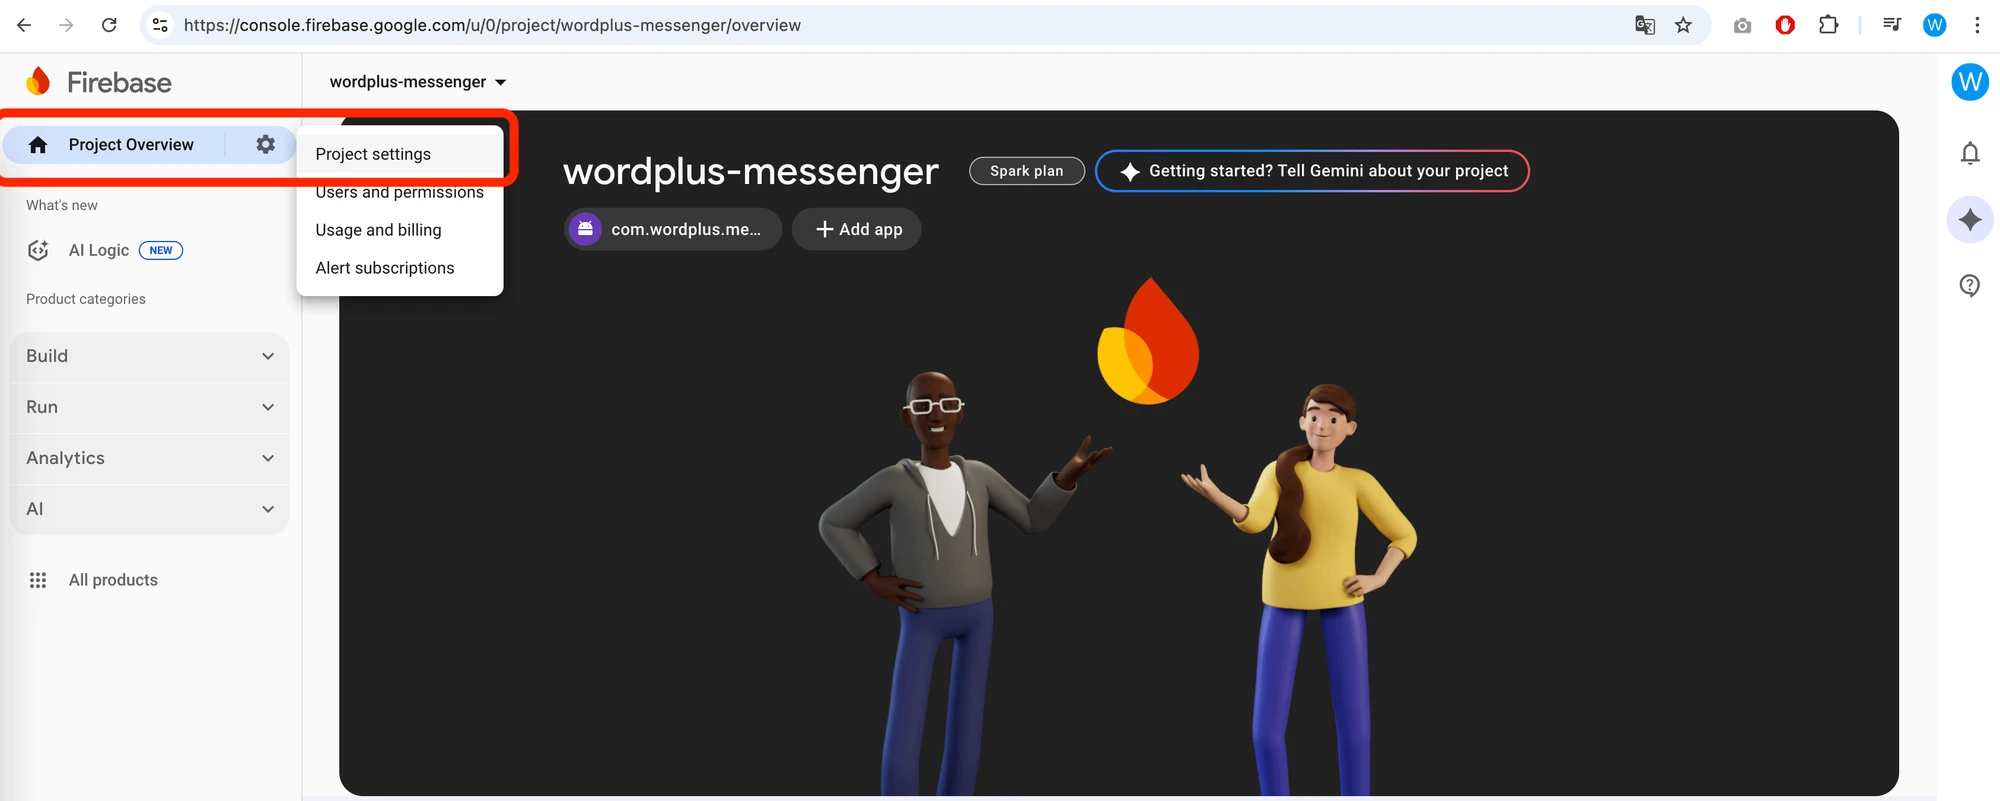
In the Firebase Console, go to Project Settings → Cloud Messaging tab.
-
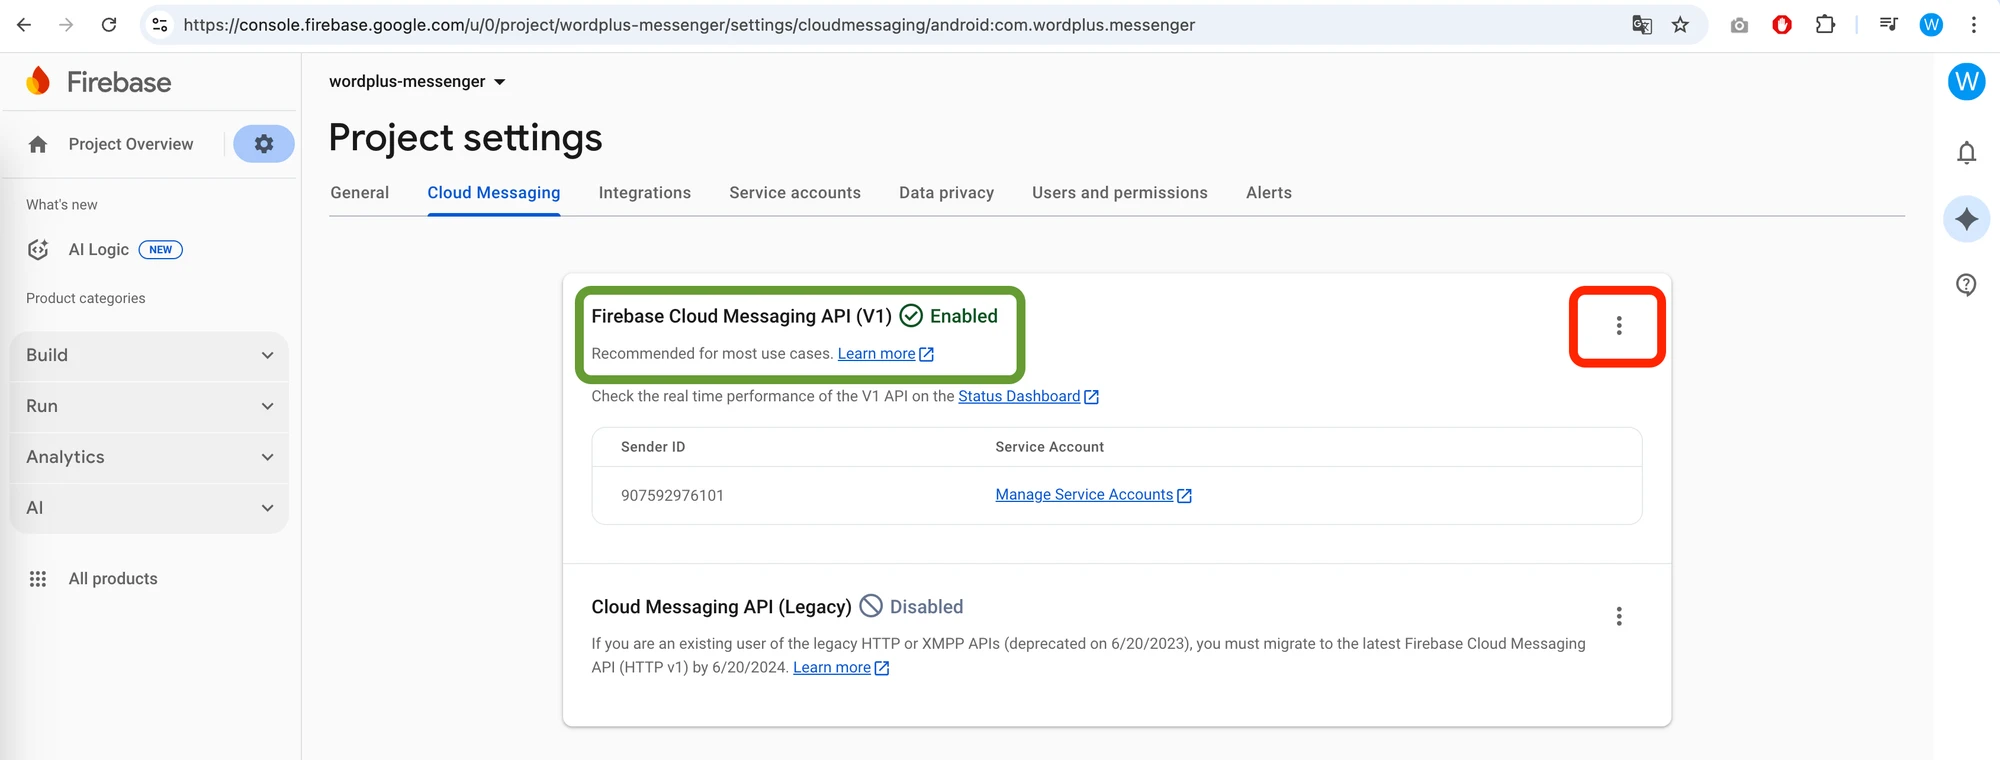
Ensure that Firebase Cloud Messaging API (V1) is enabled.
If it is not enabled, click on the 3 dots menu and enable it in Google Cloud Console.
-
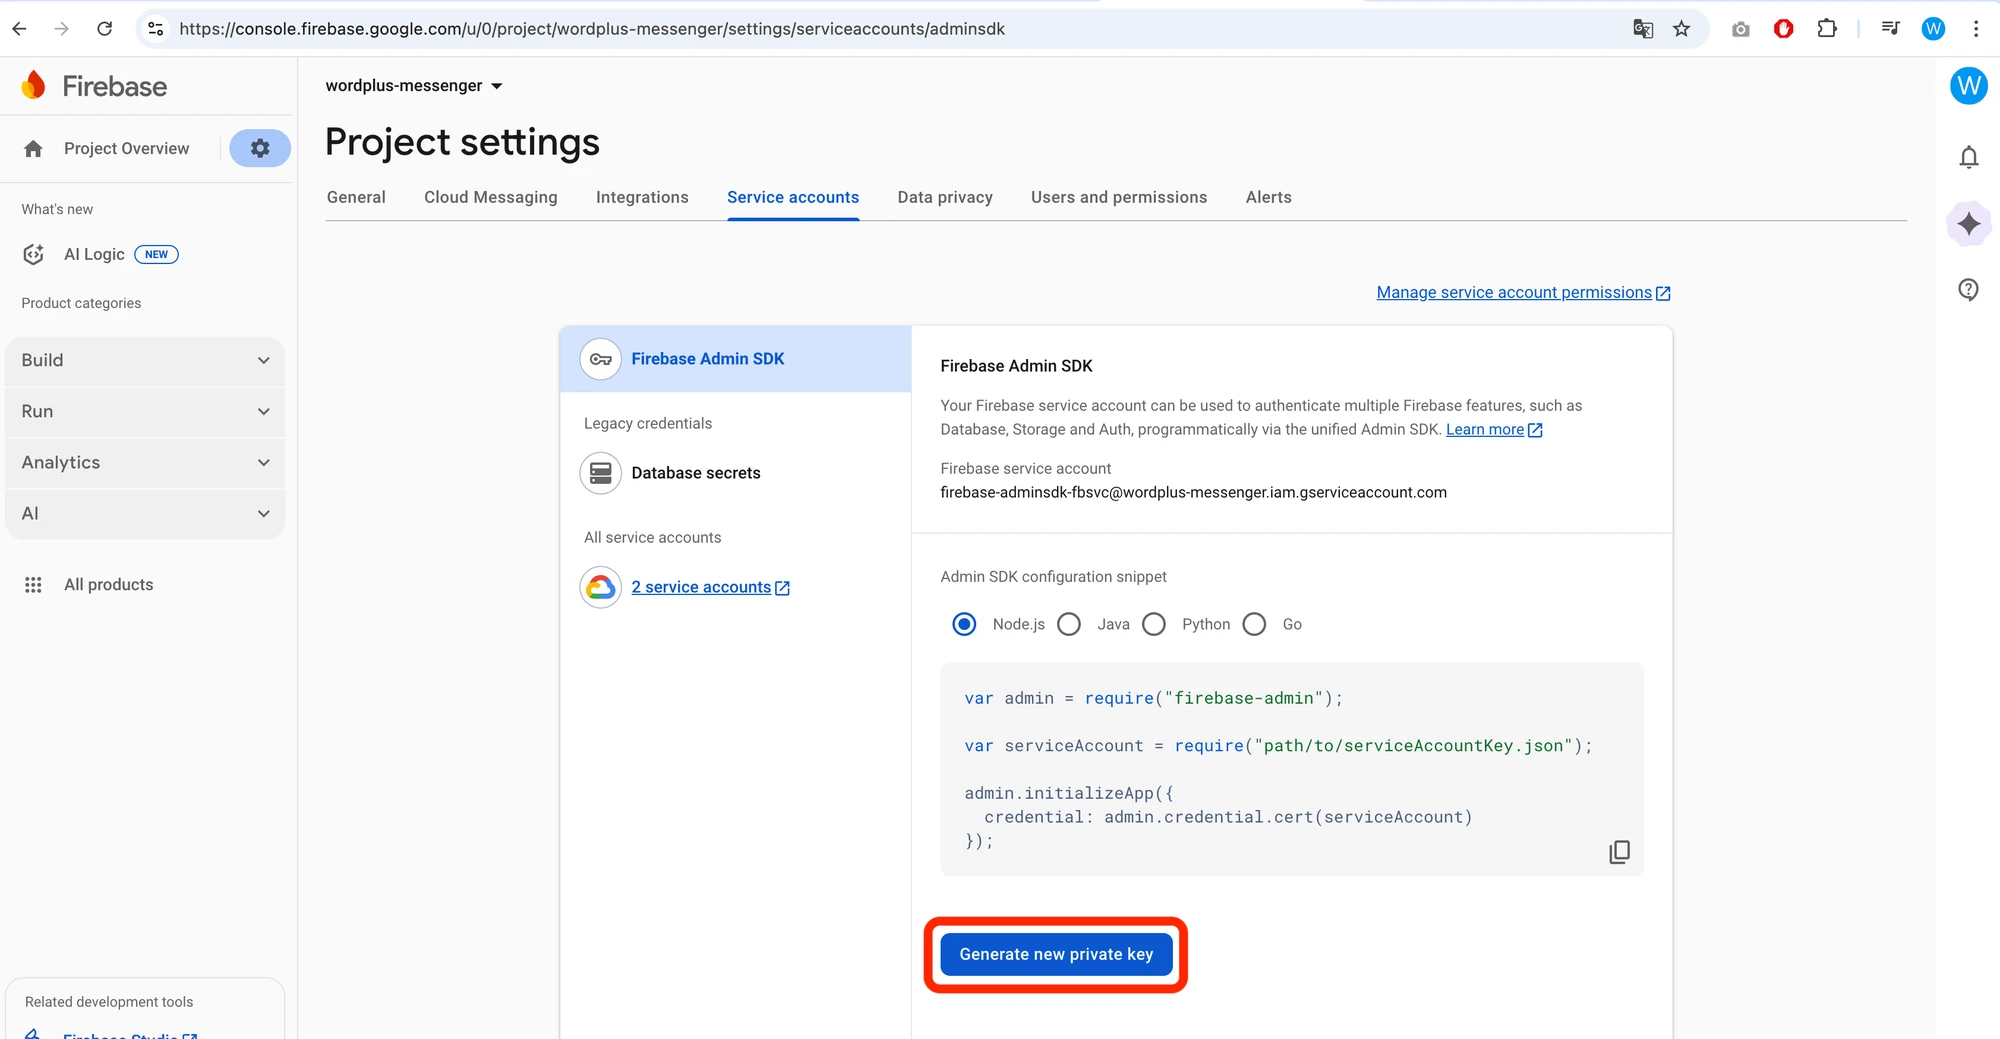
Go to Project Settings → Service accounts tab and click on the Generate new private key button to download the service account key.
Save the downloaded JSON file to your computer, you will need it later to configure the Android application build in Better Messages settings.







Development & Production Builds#
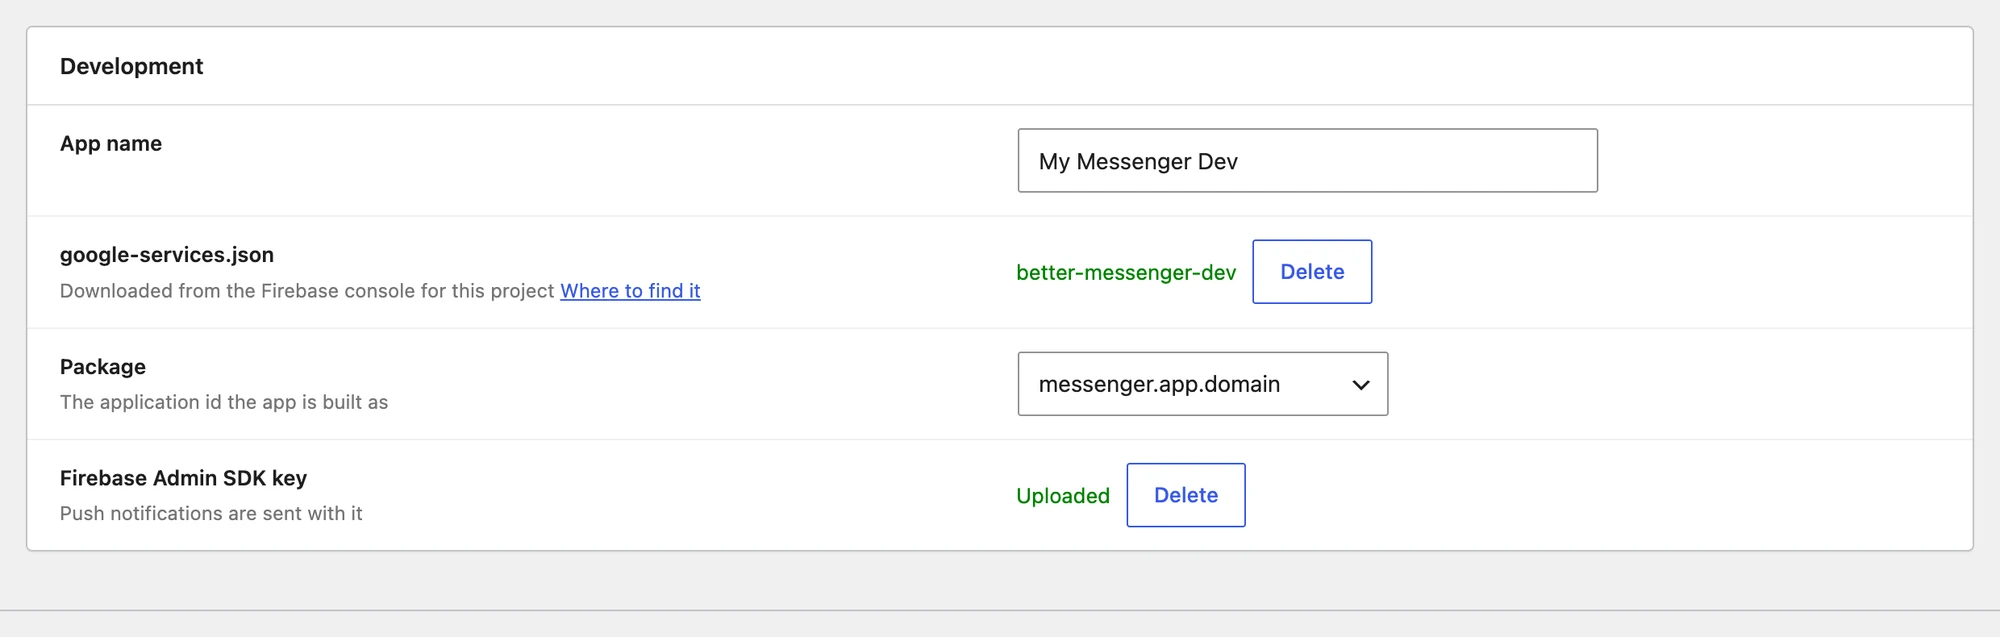
WP Admin → Better Messages → Mobile App → Android configures the two build types separately, with the files you downloaded from Firebase. Both sections carry the same four fields:
| Field | What goes in it |
|---|---|
| App name | The name the built app carries |
| google-services.json | The file downloaded from the Firebase console for this project |
| Package | The application id the app is built as. The list is read from the uploaded google-services.json, so upload that first |
| Firebase Admin SDK key | The service-account private key. Push notifications are sent with it |
Development#

Production#
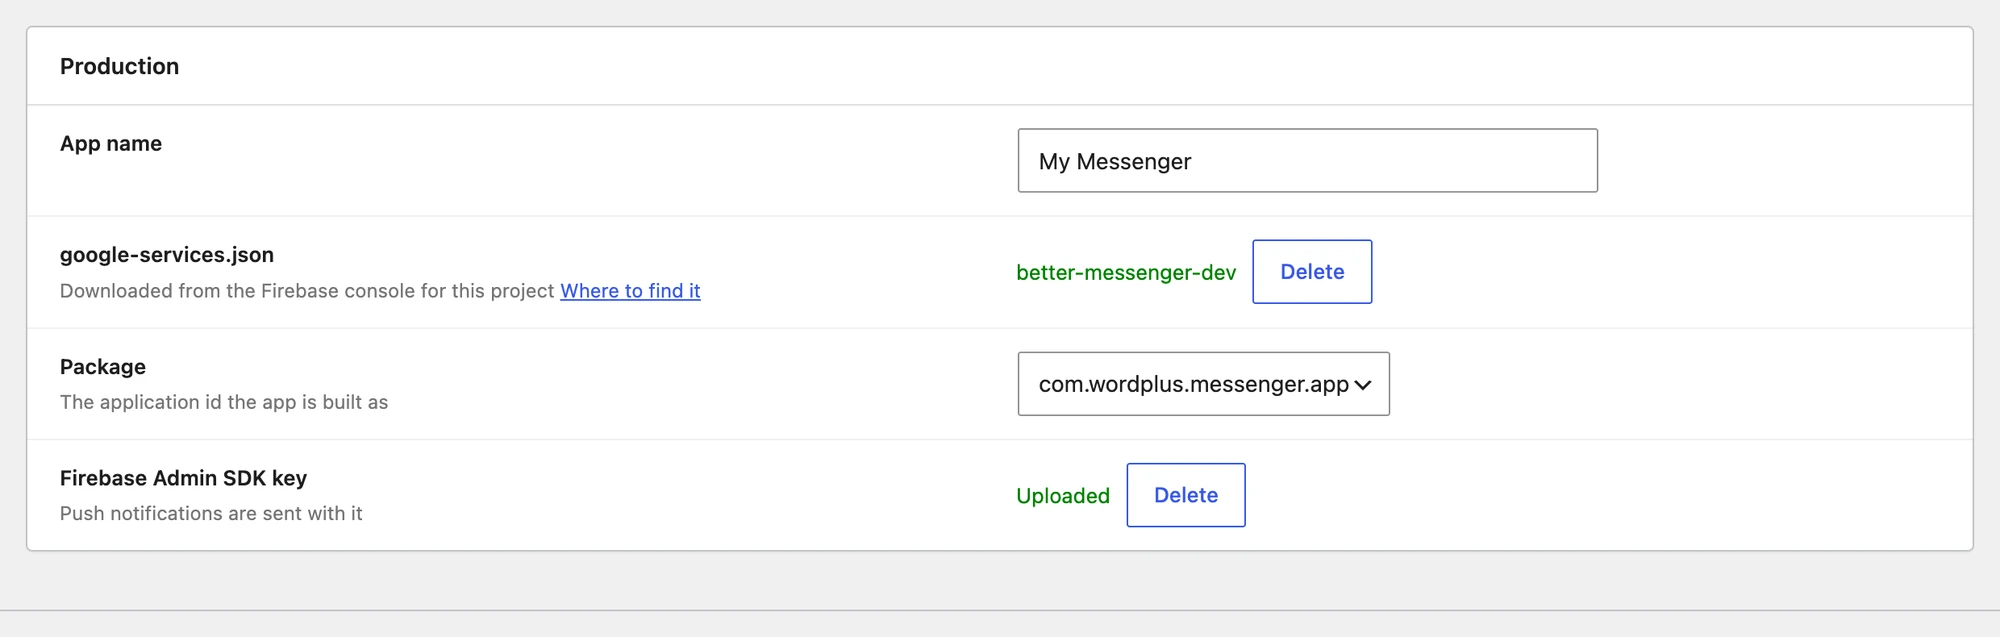
The same four fields, filled from the production Firebase project.

Signing keystore#
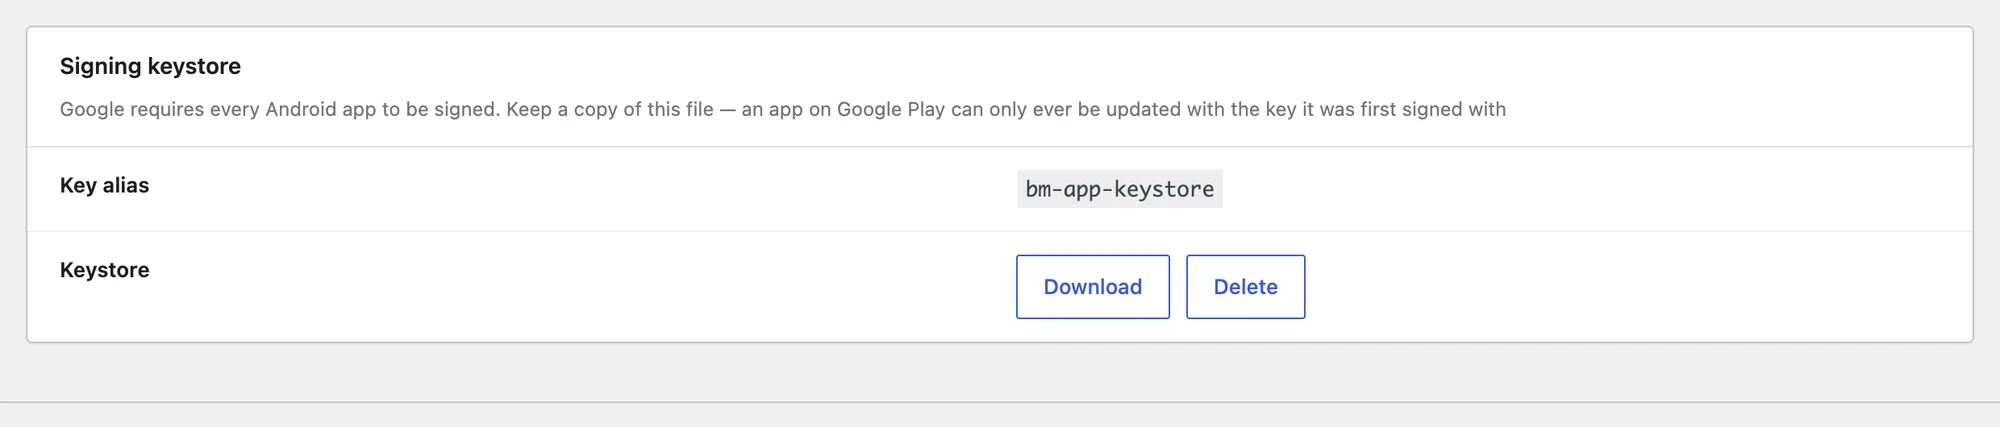
A production build also needs an Android keystore, which signs the app before it goes to Google Play. Better Messages can generate one for you — you do not need Android Studio — or you can upload an existing one.

Pressing Generate asks for two groups of values:
Credentials Information
| Field | Notes |
|---|---|
| KeyStore Password | Leave empty to generate one automatically |
| Key Alias | The name the key is stored under |
| Key Password | Leave empty to generate one automatically |
Certificate Information — First and Last Name, Organization, Organization Unit, City, State, and Country Code (XX). These are baked into the certificate and are not shown to users.

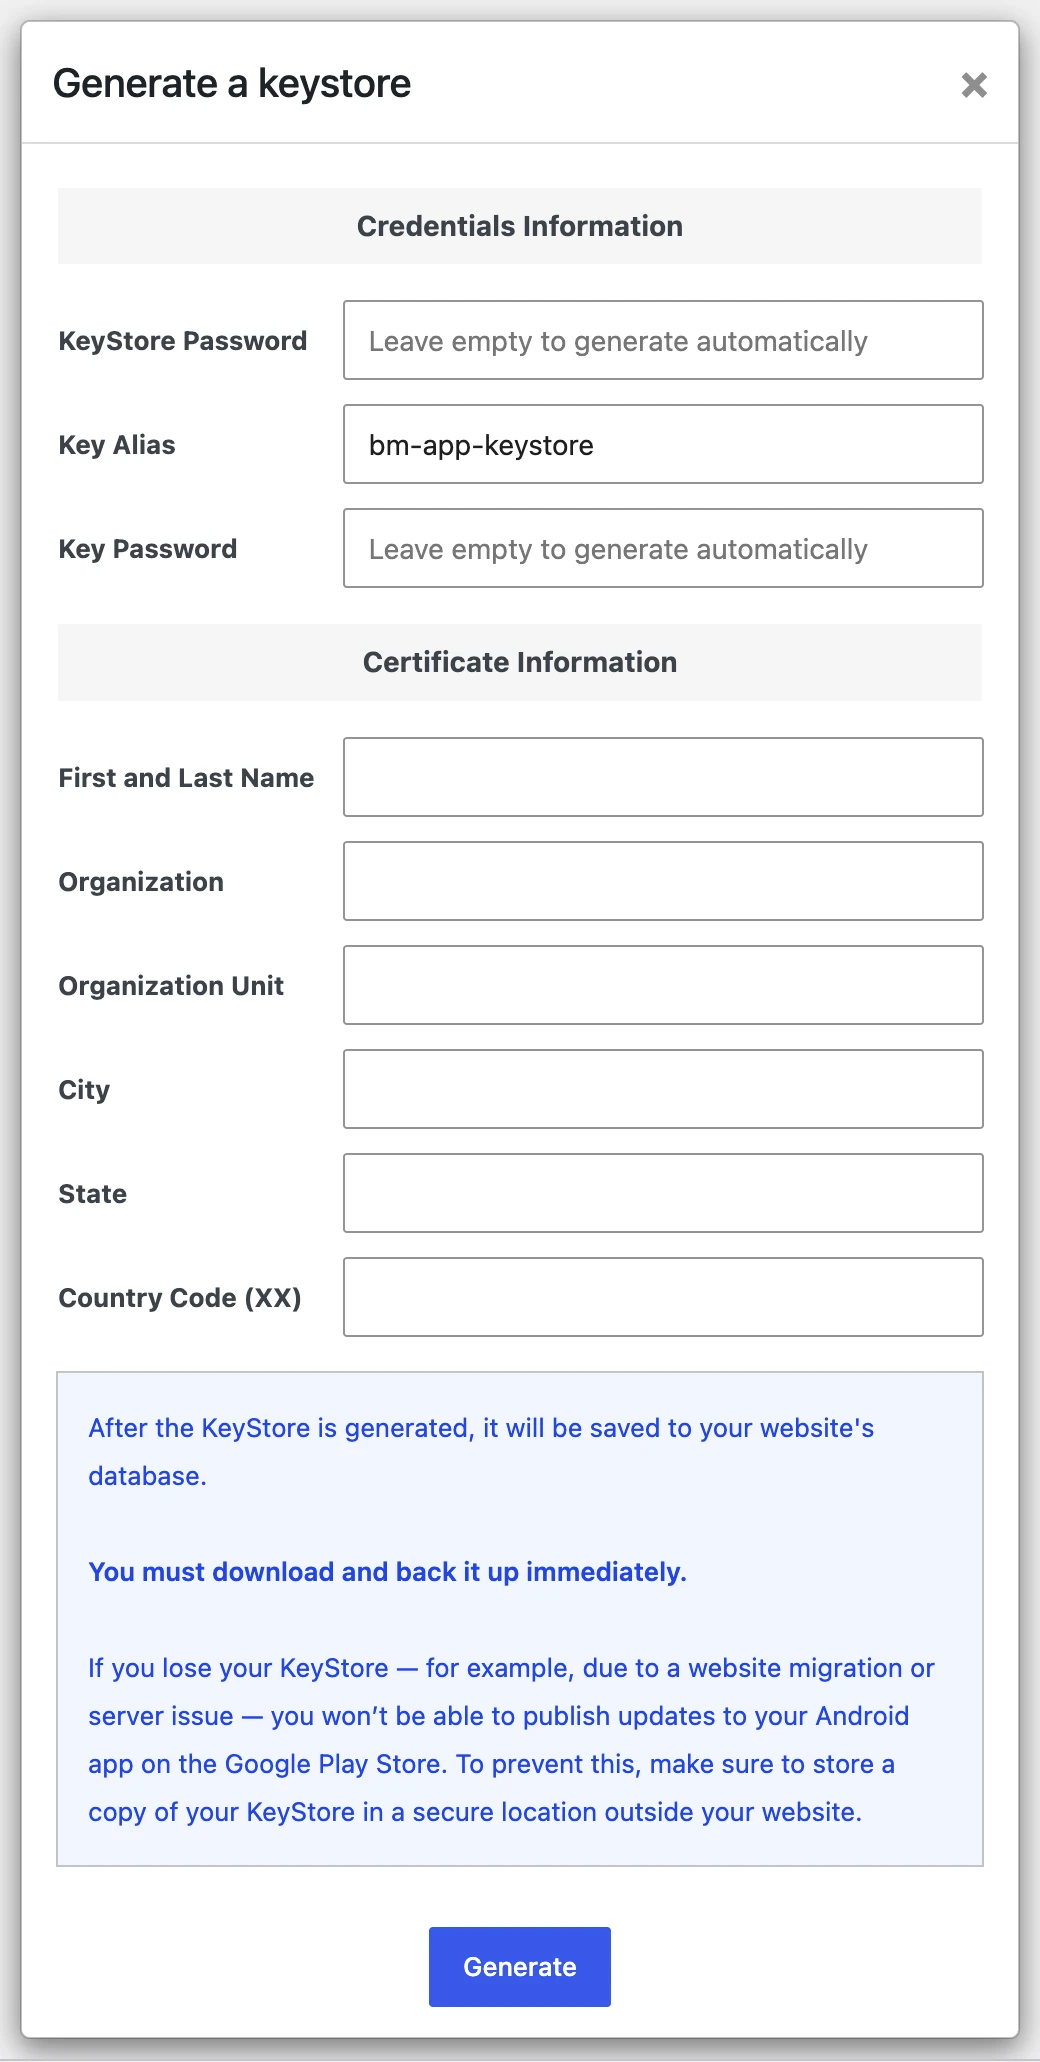
An app on Google Play can only ever be updated with the key it was first signed with. Lose the keystore and you cannot ship an update to that listing — you would have to publish a new one under a new package name. Use Download to keep a copy somewhere safe, along with the passwords.
Creating a build#
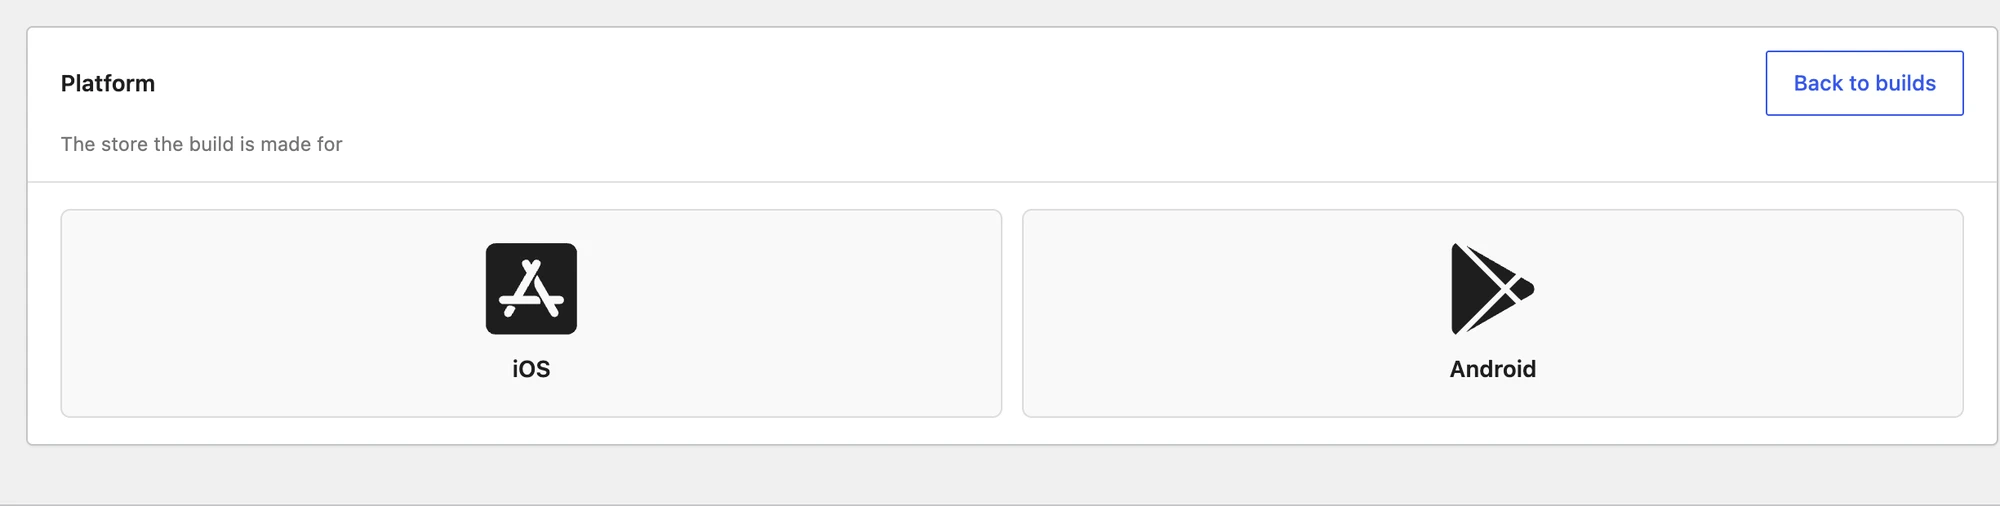
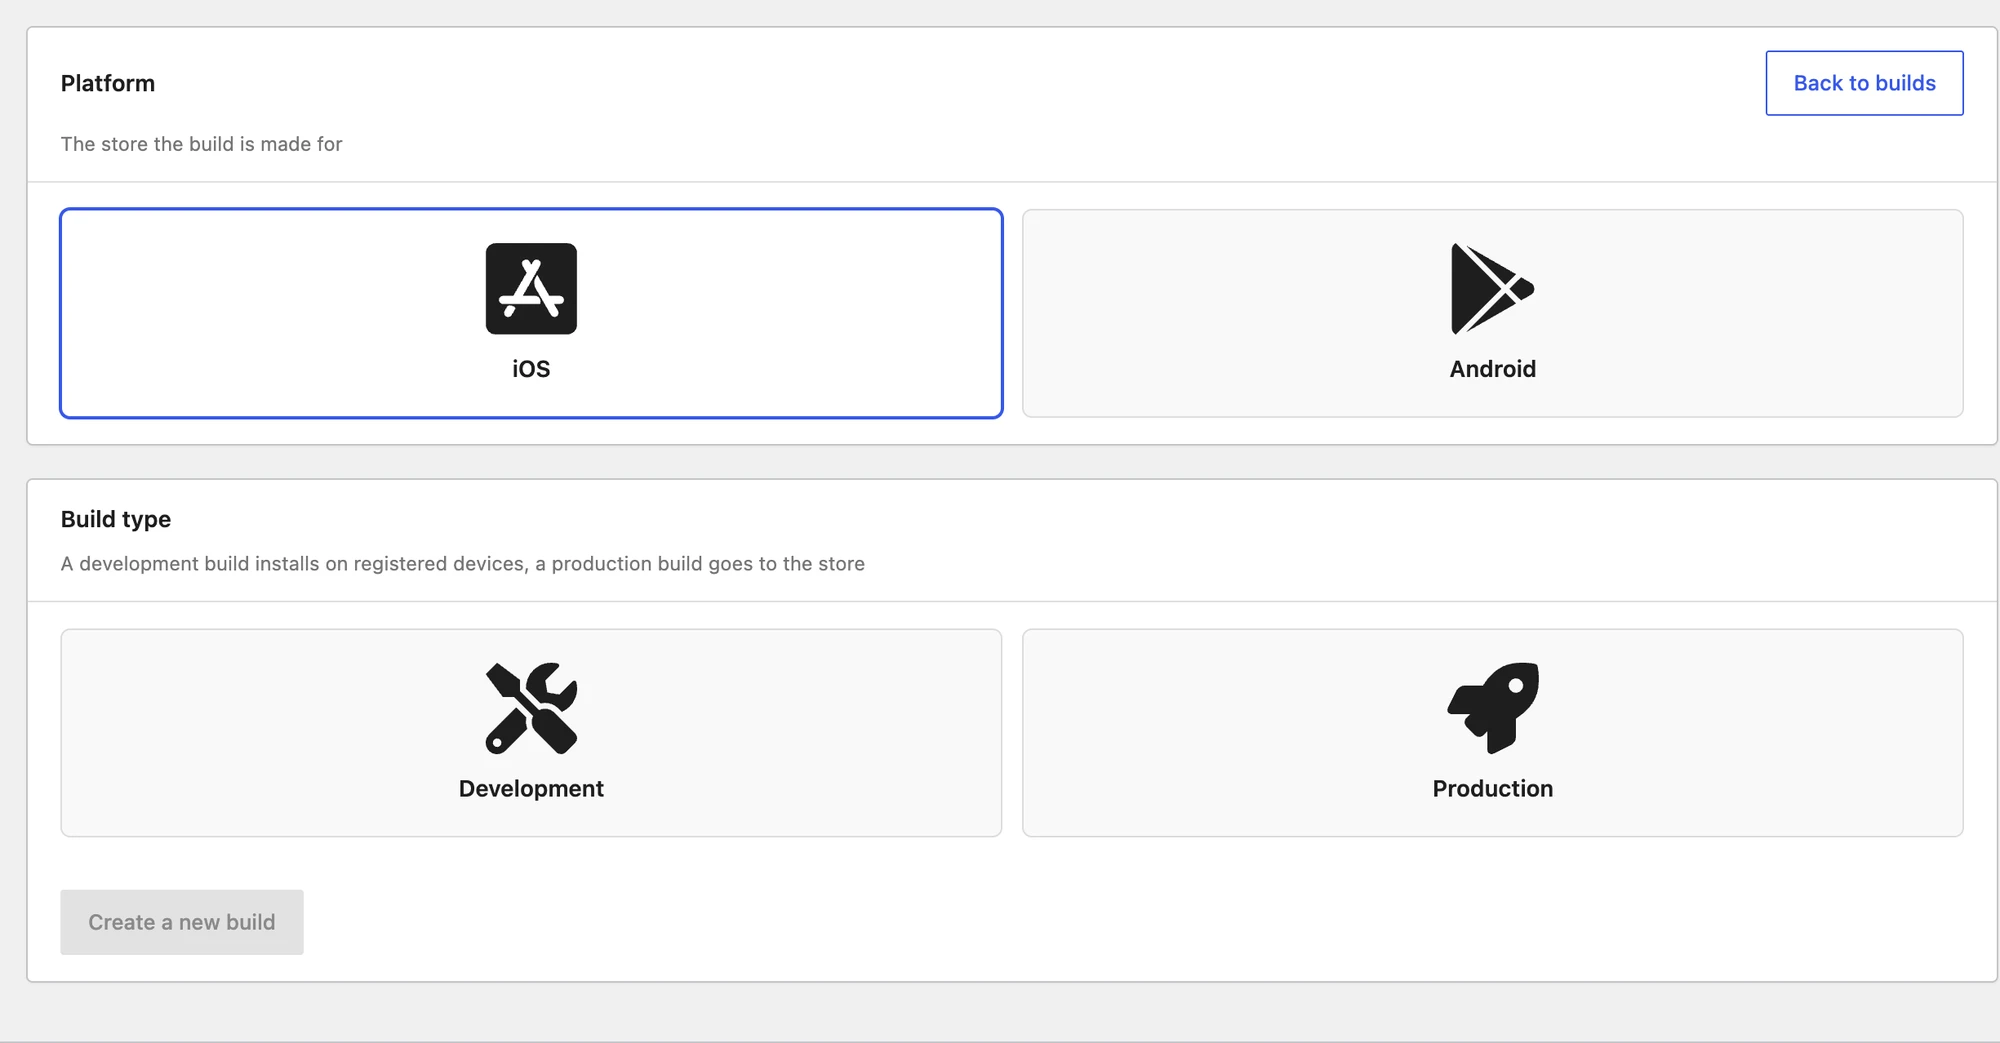
Once the settings are in place, go to the Builds tab and press New build. The flow asks two questions:
-
Platform — the store the build is made for: iOS or Android.
-
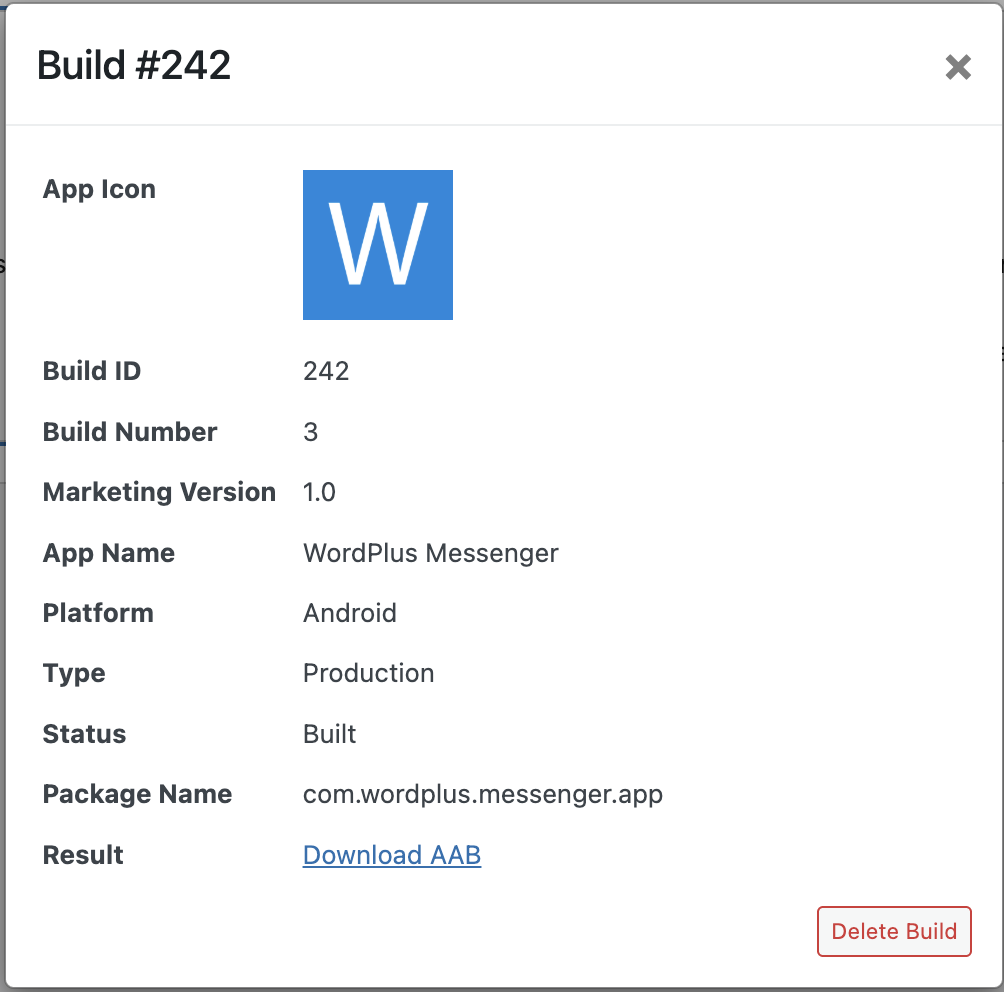
Build type — Development installs on a device or emulator directly, Production produces the AAB you upload to Google Play.
-
Better Messages then shows a Create New Build summary of what the build will be made with — site ID, platform, domain, API URL, type, app name, icon and package name — so you can read it back before starting. Press Create Build to send it to the build server.



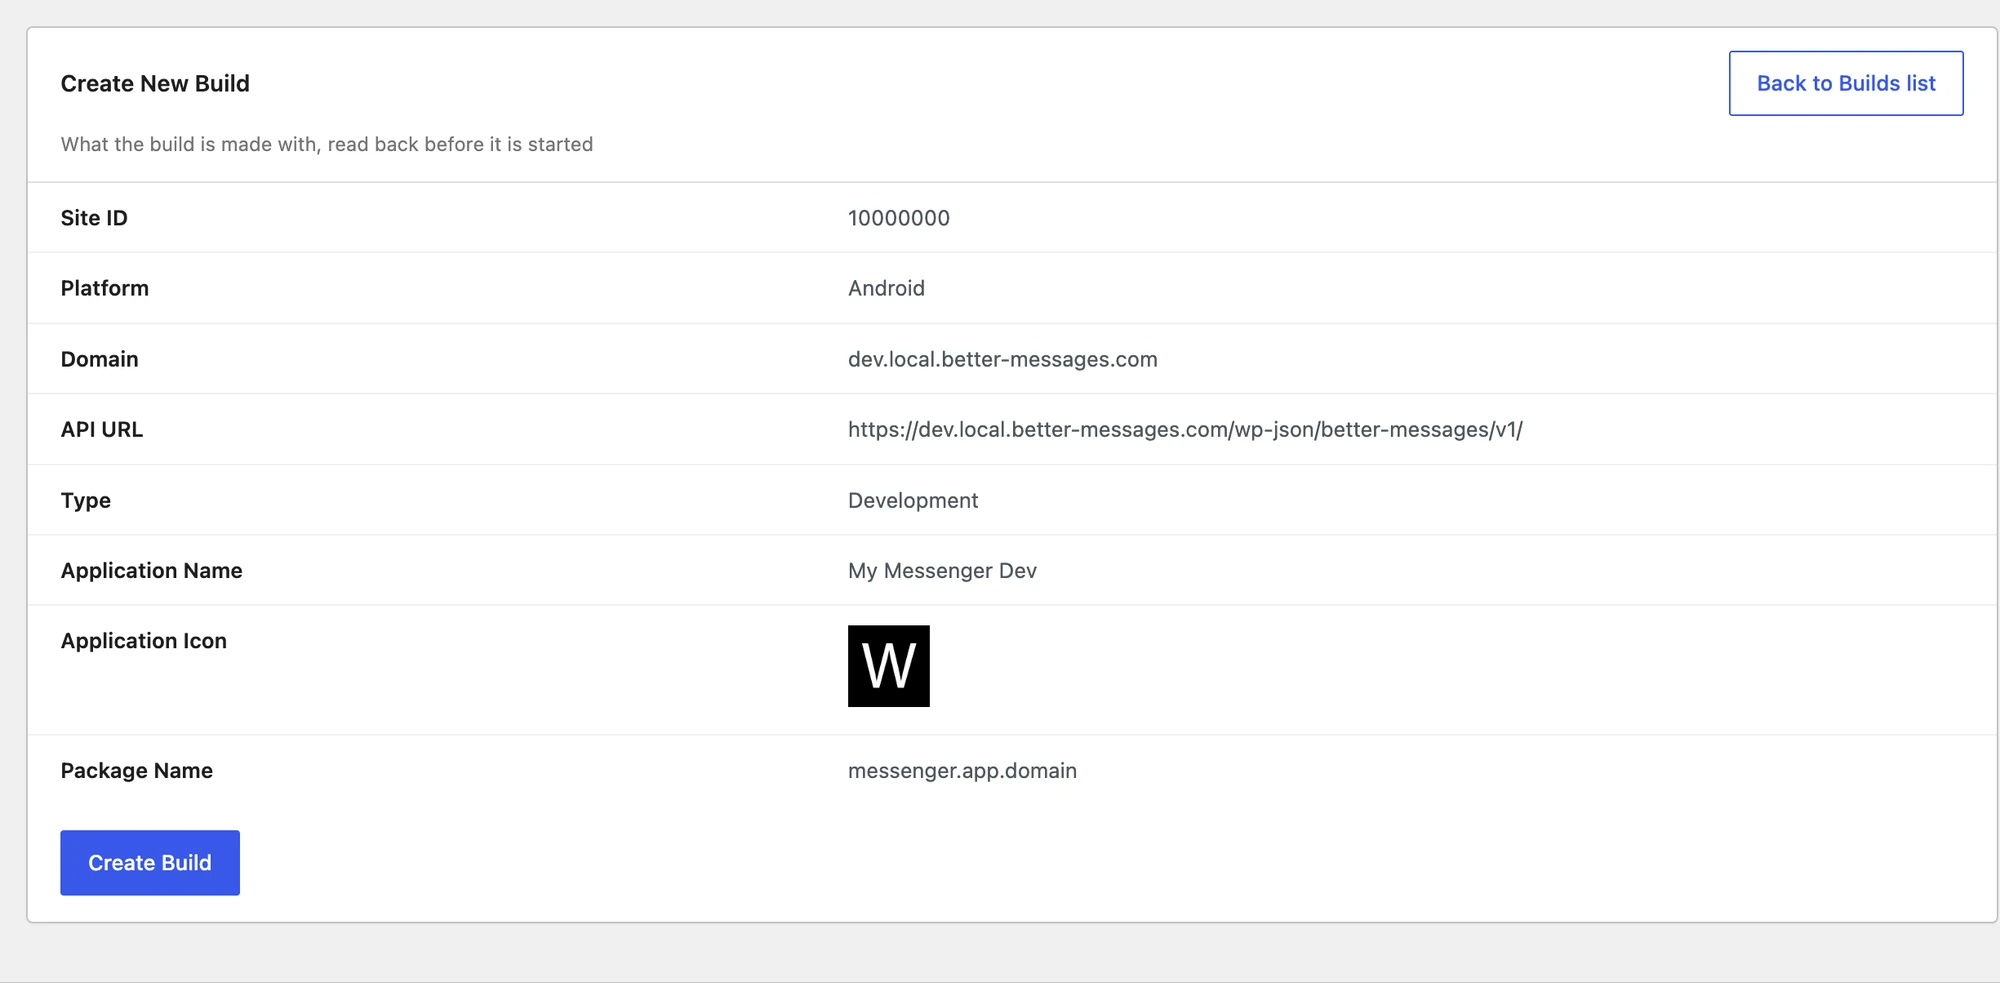
A Production build adds two more values to that summary, and you can change either from there before starting:
| Field | What it is |
|---|---|
| Version | The version people see on Google Play, like 1.0 or 1.0.1 |
| Build Number | A whole number, higher than the last one uploaded to Google Play |

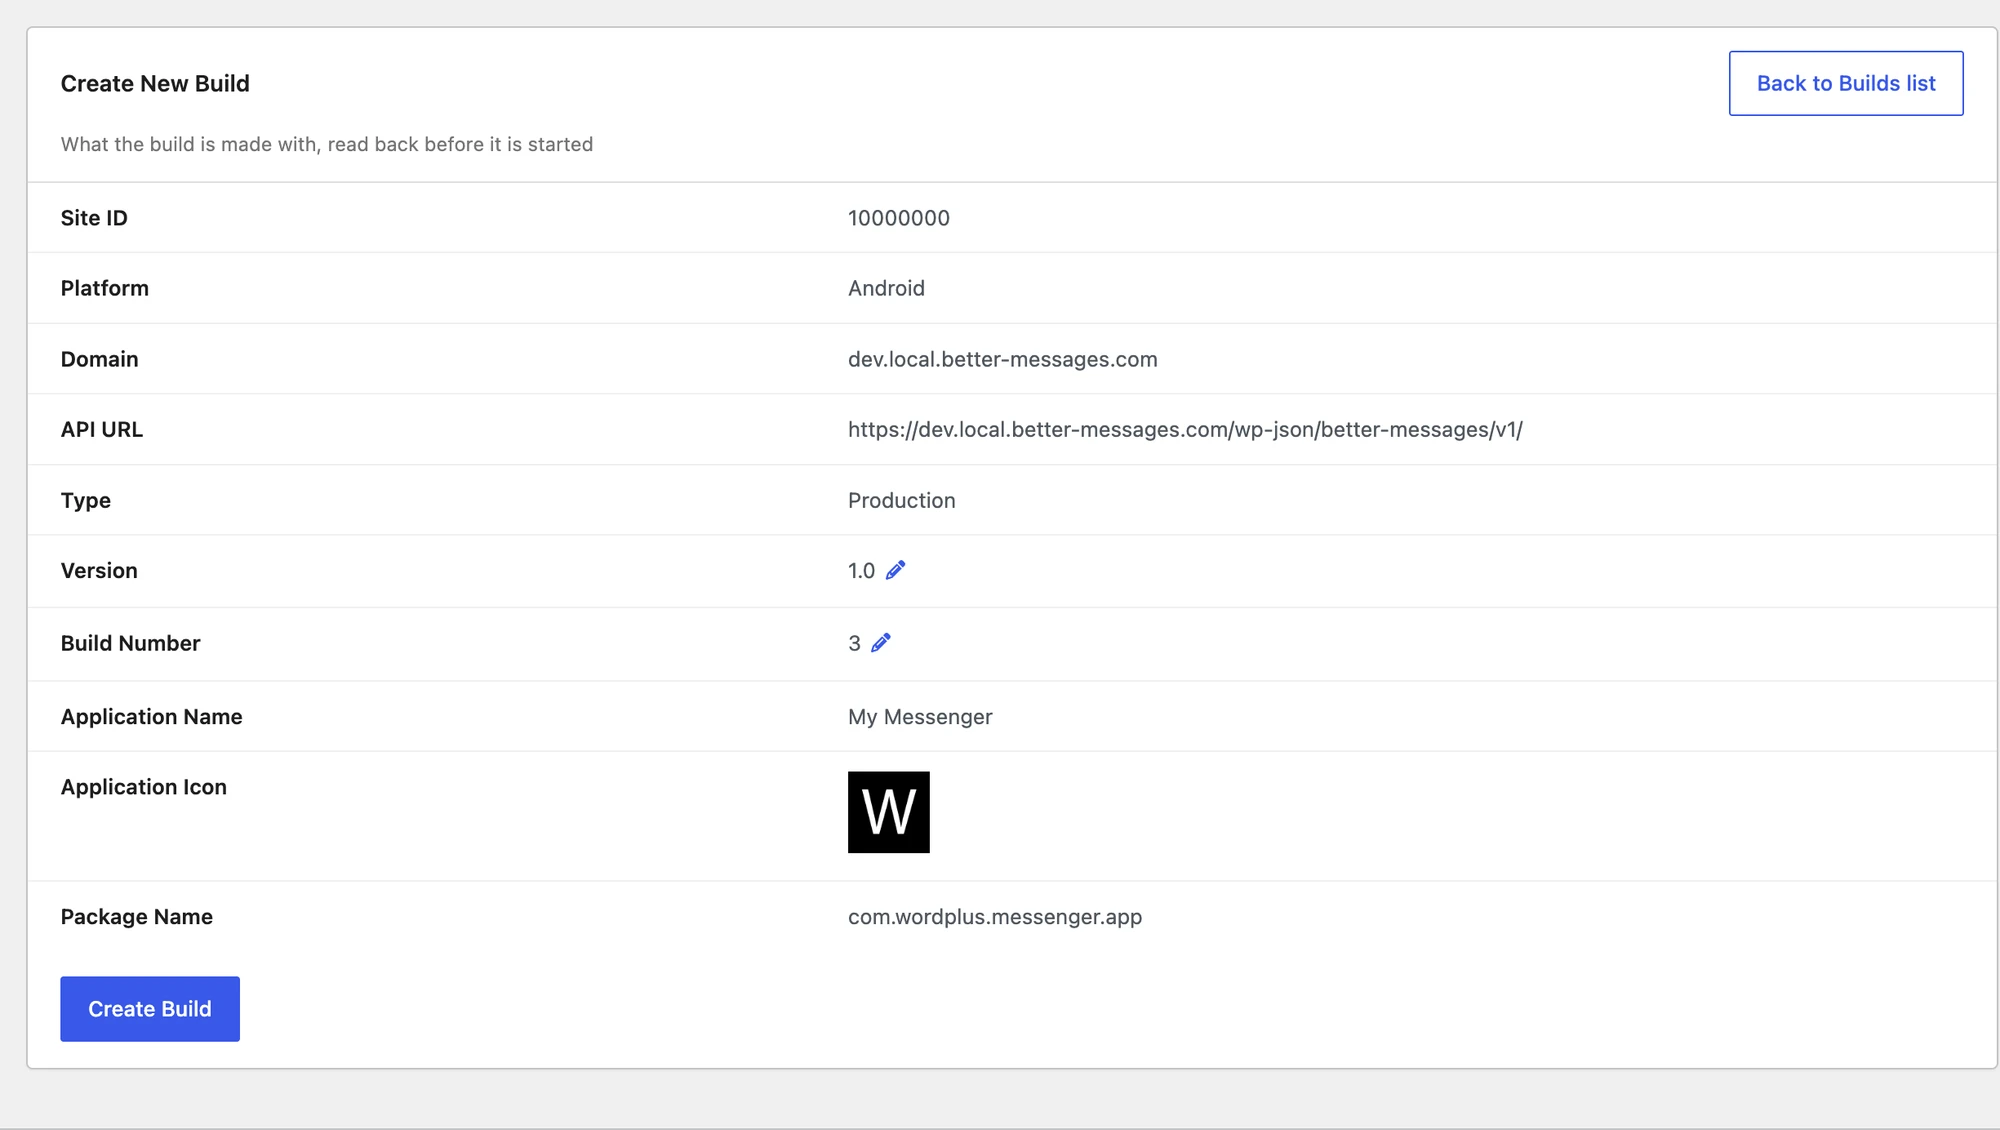
If anything required is still missing, this screen says so instead of showing the summary, and the build cannot be started until you fix it.
Development Build#
Development build is used for testing purposes and can be installed only to Android devices or Emulators.
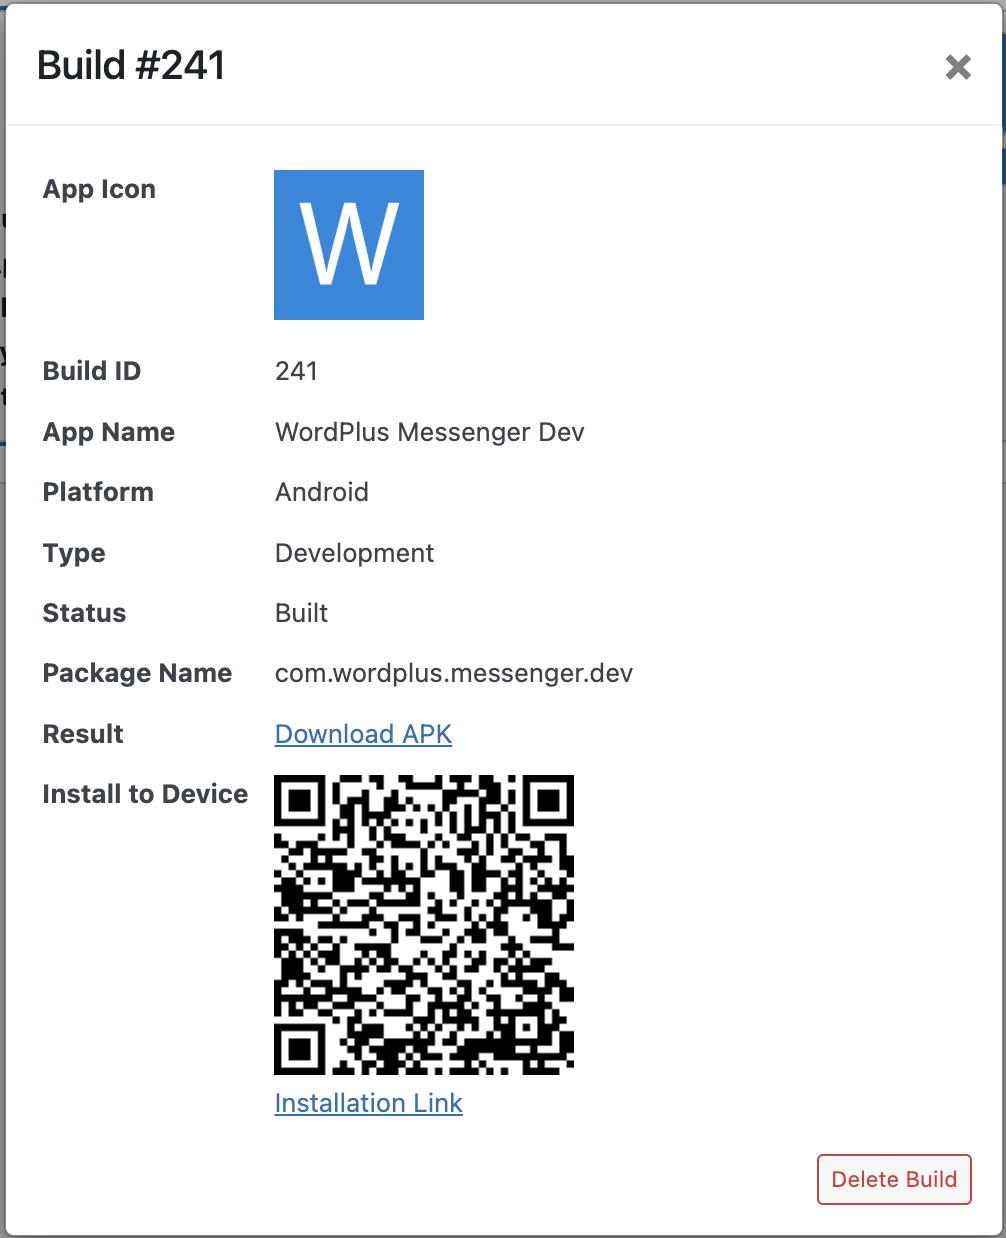
You can install the development build to your Android device or Emulator by scanning QR code with camera and downloading the APK file or by downloading the APK file directly by url.
Production Build#
Production build is only possible to upload to Google Play Store with AAB file, for that you need to have Google Developer Account, which is required to publish the application to the Google Play Market.
You can register for a Google Developer Account here.
Store screenshots#
Better Messages → Mobile App → Screenshots generates the screenshots for your Google Play listing, at the exact pixel sizes Google accepts, without you having to run the app and capture them by hand.
Screenshot generation is new. The files are the right size and format, but check each one before you upload it — a screen the generator renders badly is still a screen a reviewer sees.
What to show — pick from Inbox, Conversation and Group chat. Each screen becomes one screenshot per device size, and they appear on the listing in the order shown here. Each carries a caption drawn on the framed version, which you can edit or clear.
Sizes — Google Play rejects a file that is not one of its exact sizes, so each is written at the size named:
| Size | Pixels |
|---|---|
| Android phone | 1080 × 1920 |
| Android 7" tablet | 1200 × 1920 |
| Android 10" tablet | 1200 × 1920 |
| Feature graphic | 1024 × 500 |
Google Play takes 2 to 8 screenshots per size — note the lower bound, since one screenshot per size is rejected. The feature graphic is the banner across the top of the listing, not a screenshot of the app.
Framing — under Versions you can generate a plain capture, a framed version, or both. A plain capture is what the app really looks like. A framed one reads better at the size a store page shows it. The framed version has three settings of its own:
| Setting | What it does |
|---|---|
| Background | Two colours. Set both to the same value for a flat background, or different ones for a gradient |
| Caption colour | The colour the caption is drawn in |
| Device outline | Draws a generic rounded bezel around the screen |

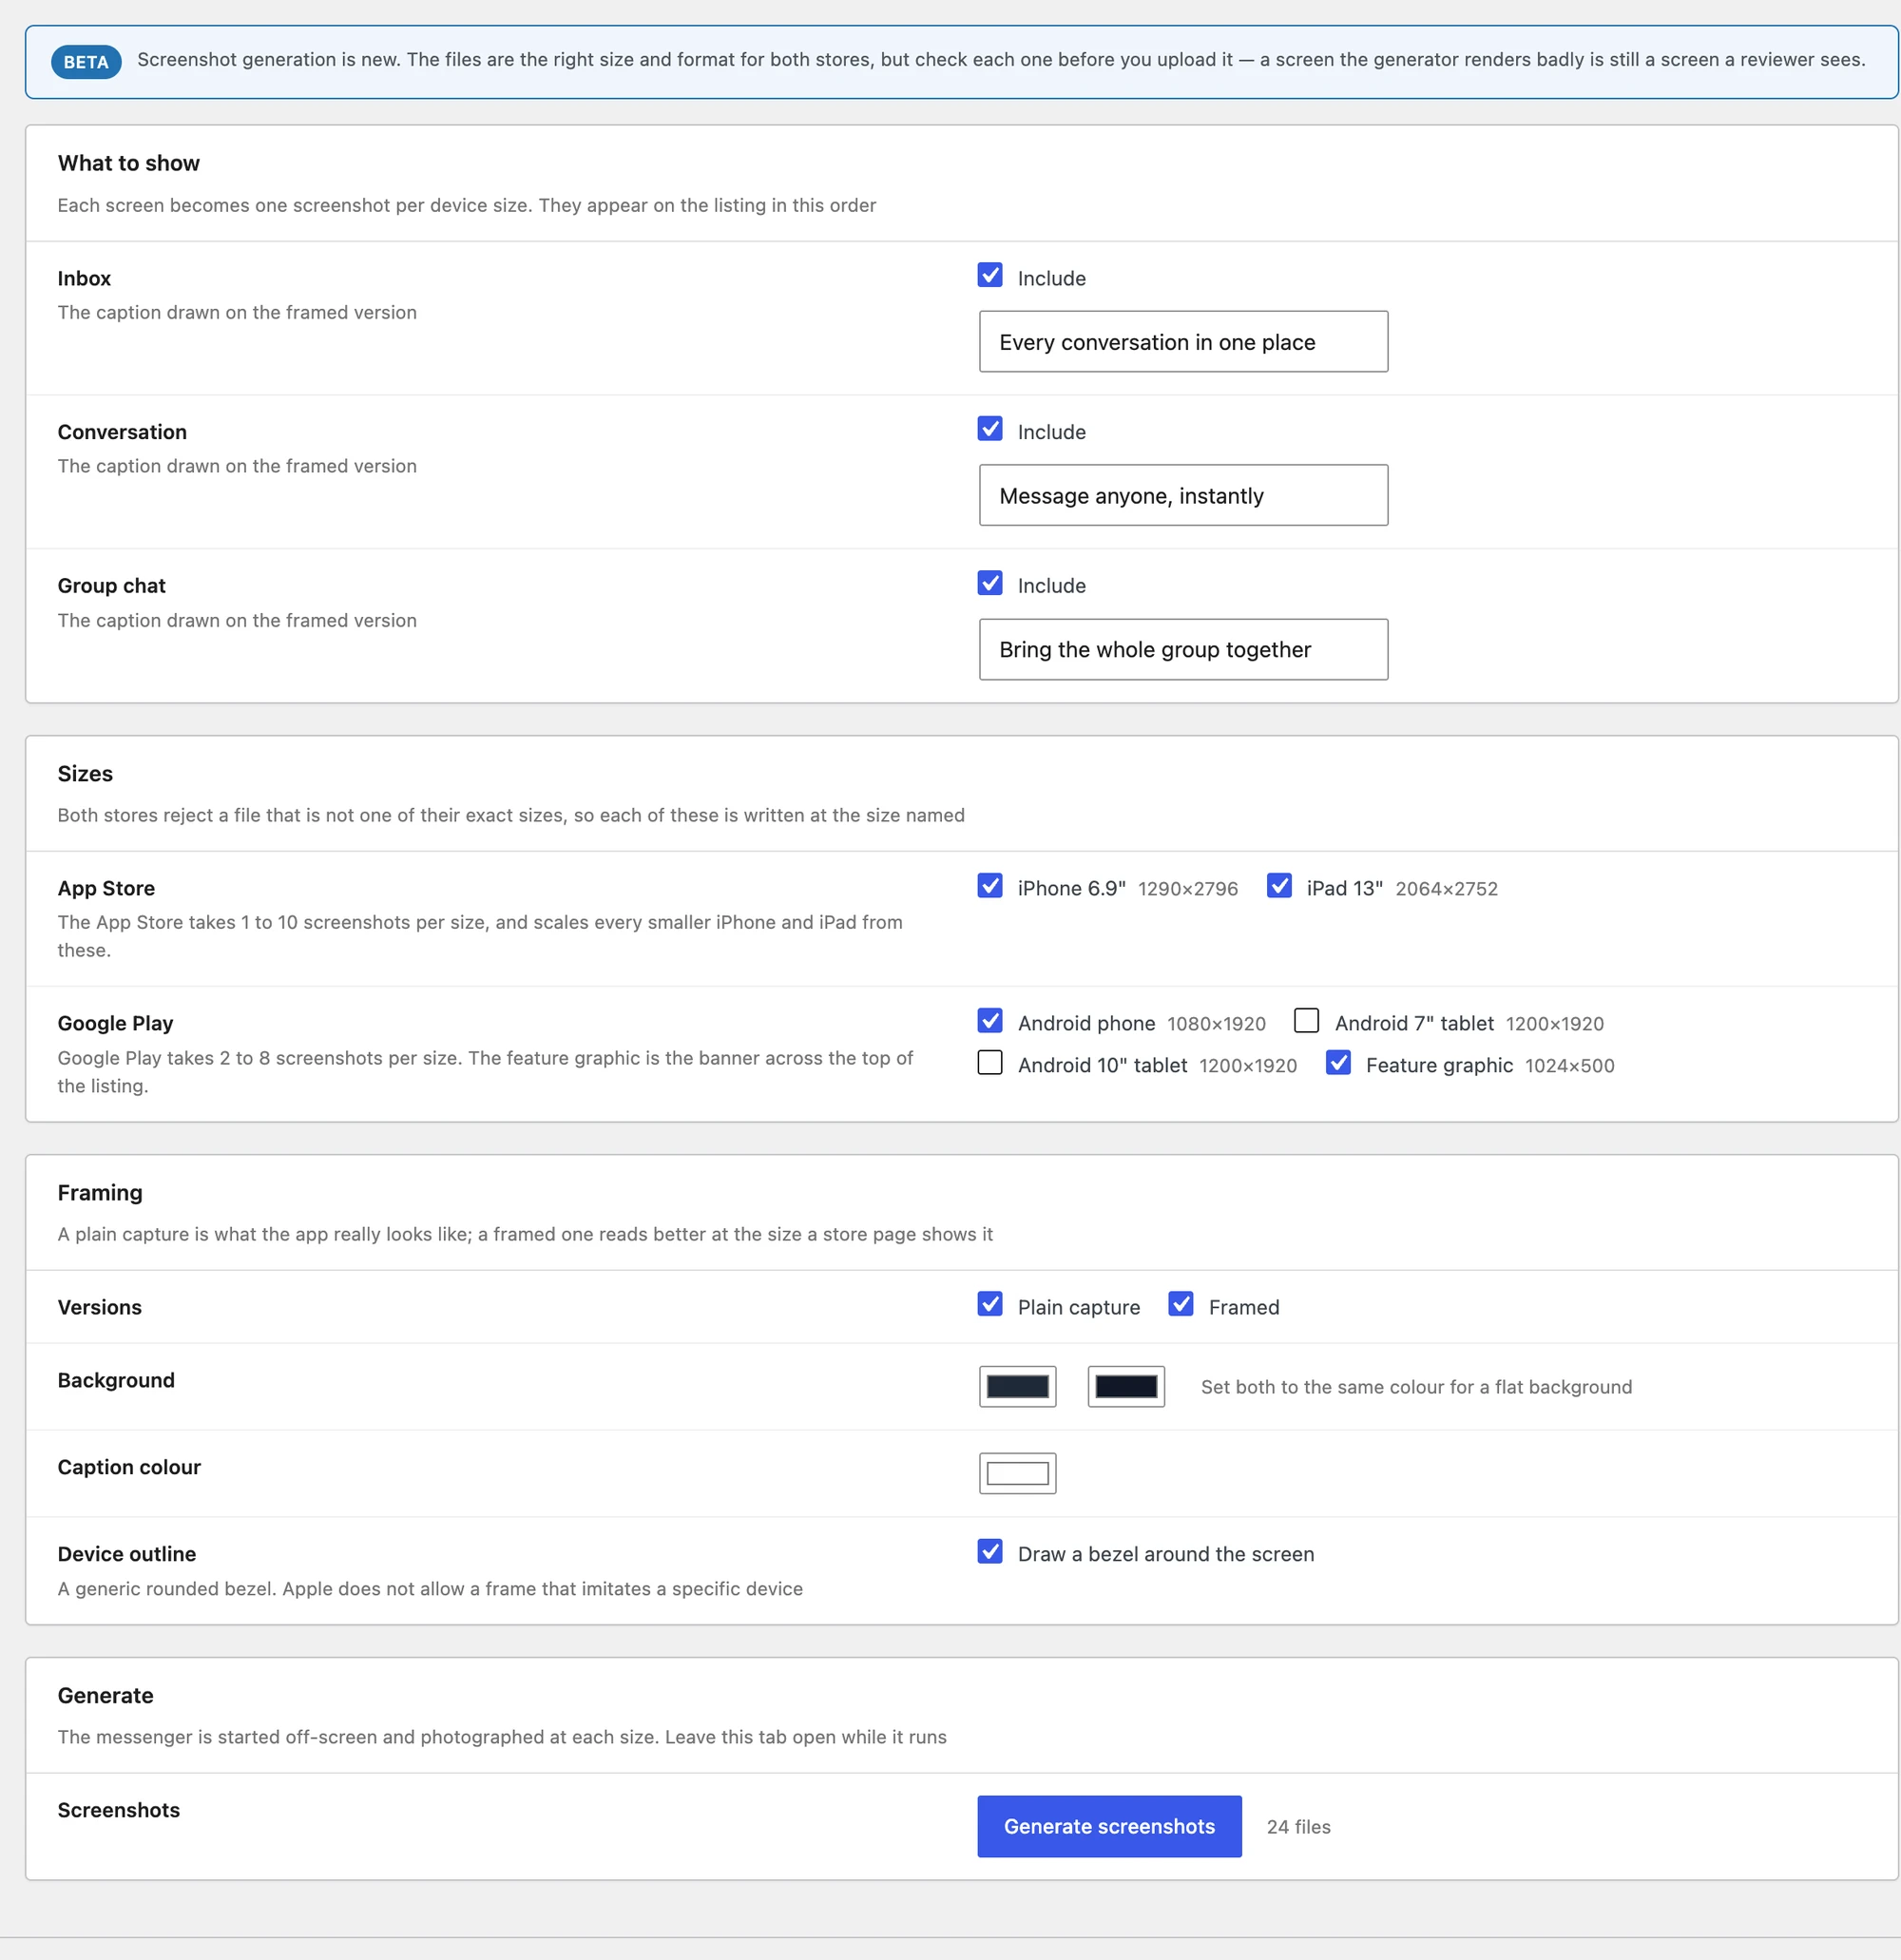
Generating starts the messenger off-screen and photographs it at each size, in the browser tab you started it from. Navigating away before it finishes cancels the run — and switching to another tab stalls it, because browsers stop painting a background tab and each shot needs a frame to be drawn. Leave the Screenshots tab in the foreground until the count reaches the end.
The shots are held in the page, not on the server: the Download buttons appear only in the result list after a run, and reloading the tab discards them. Download the ZIP before you navigate away, or you will have to generate again.
Devices#
Better Messages → Mobile App → Devices lists every device that has registered with your site from the app — searchable and paginated.
| Column | What it shows |
|---|---|
| User | The WordPress user signed in on that device |
| Device | Model and OS, marked Simulator where applicable |
| Application | Which build it is running — hover for the application identifier |
| Notifications | Subscribed or Not Subscribed for push |
| Last Active | When the app last checked in |

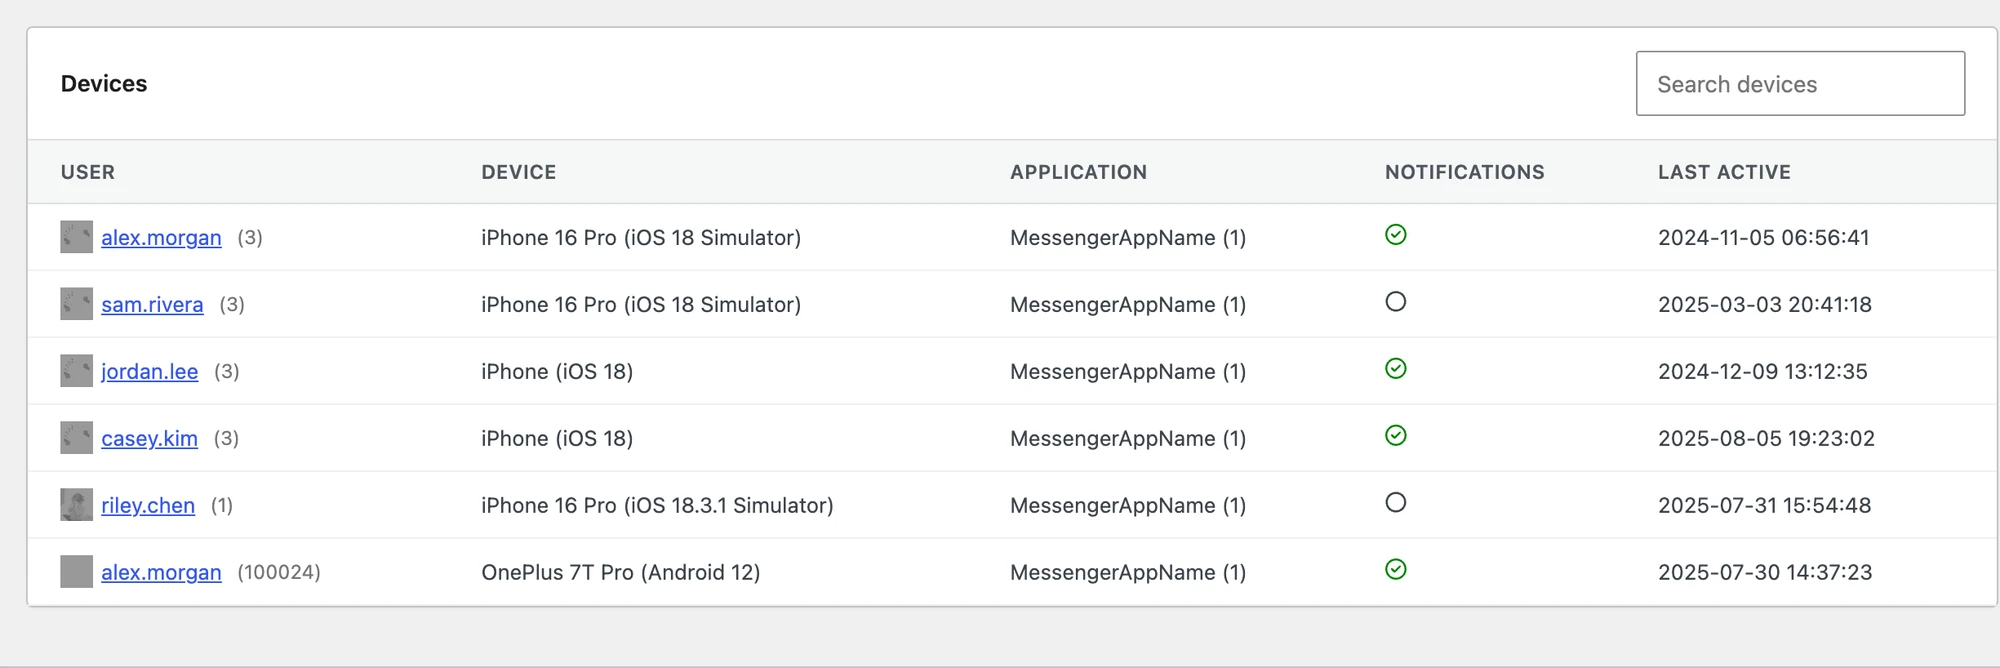
It is the quickest way to answer "why is this user not getting push notifications" — a device showing Not Subscribed never registered for them.