AI Chat Bots
Better Messages allows you to create AI-powered chat bots using multiple AI providers: OpenAI, Anthropic (Claude), and Google Gemini.
How it works#
AI bots appear as regular users in the messaging interface. When a user sends a message to a bot, the message is processed through the selected AI provider and a response is generated. Each bot can be configured with its own provider, model, system instructions, and specific capabilities. In group conversations, bots respond when mentioned with @botname.
Key capabilities#
- Multiple AI providers — choose between OpenAI, Anthropic (Claude), and Google Gemini per bot
- Create multiple AI bots with different personalities and purposes
- Custom system prompts to define bot behavior and knowledge
- Welcome message — auto-sent by the bot when a user starts a new 1:1 conversation, with a live preview of the first-message experience
- Dynamic placeholders and conditionals in system prompts and welcome messages — reference the user, site, current date/time, and bot identity
- Per-bot settings — each bot can have its own provider, model selection, and API key override
- Voice messages — users can speak to a bot instead of typing. The recording is transcribed and the bot answers what was said, on any provider
- Web search — bots can search the web for current information
- File search — bots can search through uploaded knowledge base files (OpenAI)
- Image generation — bots can generate images (OpenAI, Gemini)
- Real-time response streaming in conversations
- Group conversation support — add bots to group conversations, bots respond when mentioned with @botname
- Conversation summarization — AI-generated summaries of conversation history, configurable per thread
- Scheduled digests — AI-generated conversation digests on a schedule (hourly, twice daily, daily), configurable per thread
- Token usage tracking — per-bot token usage tracking with cost estimation
- Points charging — charge users MyCred or GamiPress points for AI responses
- Online presence — bots appear as online users (WebSocket version)
- Typing indicators — bots show a typing indicator while generating responses (WebSocket version)
- E2E encryption exclusion — bots are automatically excluded from end-to-end encrypted conversations
- Dedicated admin page for bot management
How to enable#
Step 1: Configure your AI provider API keys at WP Admin → Better Messages → Settings → Integrations → AI Services.
- OpenAI — Enter your API key from platform.openai.com
- Anthropic — Enter your API key from console.anthropic.com
- Google Gemini — Enter your API key from aistudio.google.com
You only need to configure the providers you plan to use.
Step 2: Create and configure bots at WP Admin → Better Messages → AI Chat Bots.
- Click Create New Bot in the left sidebar and give the bot a name
- General — avatar, Enabled, Respond to Mentions, and the bot's shortcodes
- AI Provider — provider, model, optional per-bot API key overriding the global one, temperature and token limits
- Behavior — the Instruction (system prompt) and the Welcome Message
- Capabilities — Enable Images, File Input, Voice Input, Image Generation, Web Search, File Search (availability depends on provider)
- Summarization, Scheduled Digest and User Pricing as needed
- Click Save in the bar that appears once there are unsaved changes
Write detailed system prompts for your bots. The more specific the instructions, the better the bot will perform for your specific use case.
Voice messages#
Users can speak to a bot instead of typing. The recording is transcribed and the transcript is what the bot reads, so this works on every provider — an Anthropic or Gemini bot takes a voice message just as well as an OpenAI one. No audio is ever sent to the bot's own provider.
Two things are needed:
- The Voice and Video Messages add-on, active as usual.
- A transcription provider at WP Admin → Better Messages → Settings → Voice Messages — either Better Messages Transcription AI (included with the WebSocket license) or the OpenAI Transcription API (your OpenAI key).
The Enable Transcription switch on that tab is not required. It governs the Transcribe button people press on a voice message themselves. A bot only needs a transcription provider to be configured, because it is handed the transcript either way.
Each bot then has its own Voice Input switch in the bot editor, under Capabilities, on by default. Turn it off for a bot that should be written to only — the microphone then disappears in that bot's conversations. Role restrictions set on the Voice Messages tab still apply on top: a role that may not send voice messages cannot send them to a bot either.
What the sender sees#
The moment the voice message is sent it shows Transcribing… instead of a Transcribe button, and the transcript appears under the recording as soon as it is ready — the same text the bot received. The bot's reply streams in right after.
If the recording cannot be transcribed, the bot answers with a short note saying so instead of replying to silence.
OpenAI's audio models (model names containing -audio-) work differently: they accept voice messages regardless of these settings and reply with a voice message of their own, in the voice picked in the bot editor.
Welcome message#
Each bot can have a Welcome message — the first thing the bot says when a user starts a new 1:1 conversation with it.

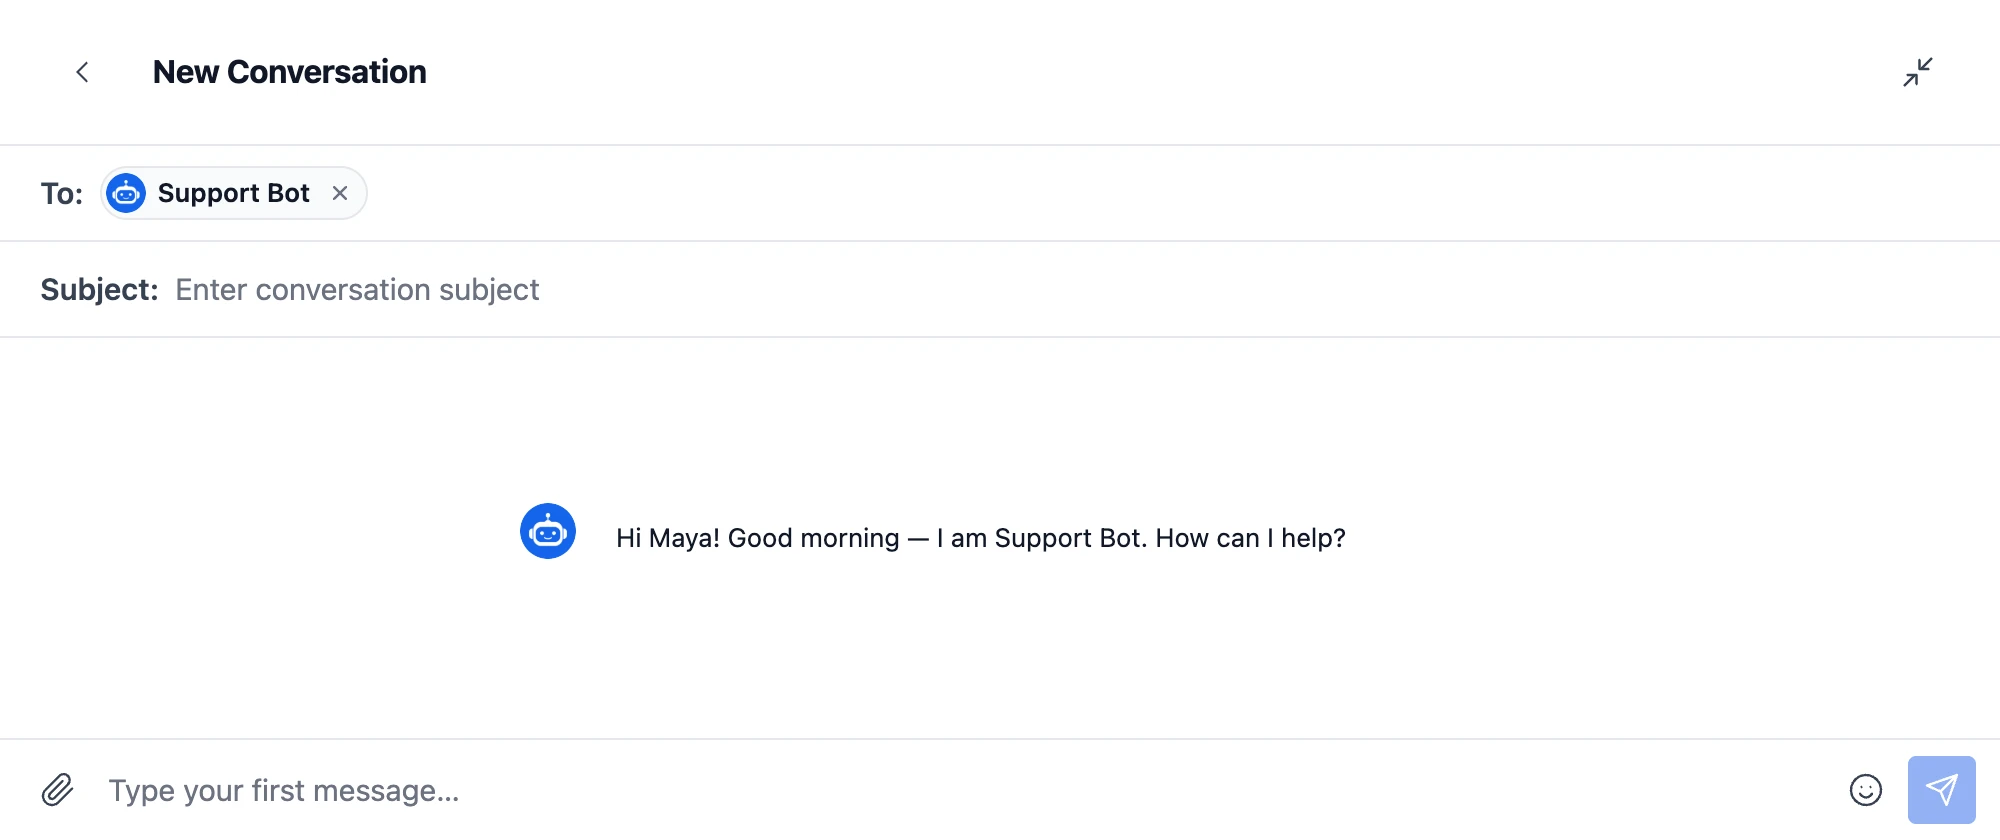
The welcome message appears in two places:
- Virtually on the New Conversation screen the moment the user picks the bot as the recipient — before the thread even exists, so visitors can see how the bot greets them before typing anything.
- Persisted as the first real message of the thread once the user sends their first message, so it shows in the conversation history on reload.
Delivery is silent: the welcome message does not increment the unread badge and does not send push notifications.
The welcome message is sent only for 1:1 conversations. Adding the bot to an existing group chat or a chat room does not trigger it.
By default the welcome message is also passed to the AI provider as part of the conversation history, so the bot stays aware of what it said. You can turn this off per-bot with the Include Welcome in Context toggle to save input tokens.
Formatting#
The welcome message supports both Markdown and raw HTML — use whichever is more convenient:
Hi **{first_name}**! Check out our [knowledge base](https://example.com/docs)
or jump to <a href="/support" target="_blank">support</a>.
Unlike AI-generated replies (which are HTML-entity-encoded before rendering so that any < in model output shows as literal text), the welcome message template is authored by an admin and is therefore rendered as-is through the same Markdown + HTML pipeline used by other bot messages. This means you can embed links, bold text, line breaks, and simple tags like <code>, <b>, <em>, and <a href> directly.
Placeholders#

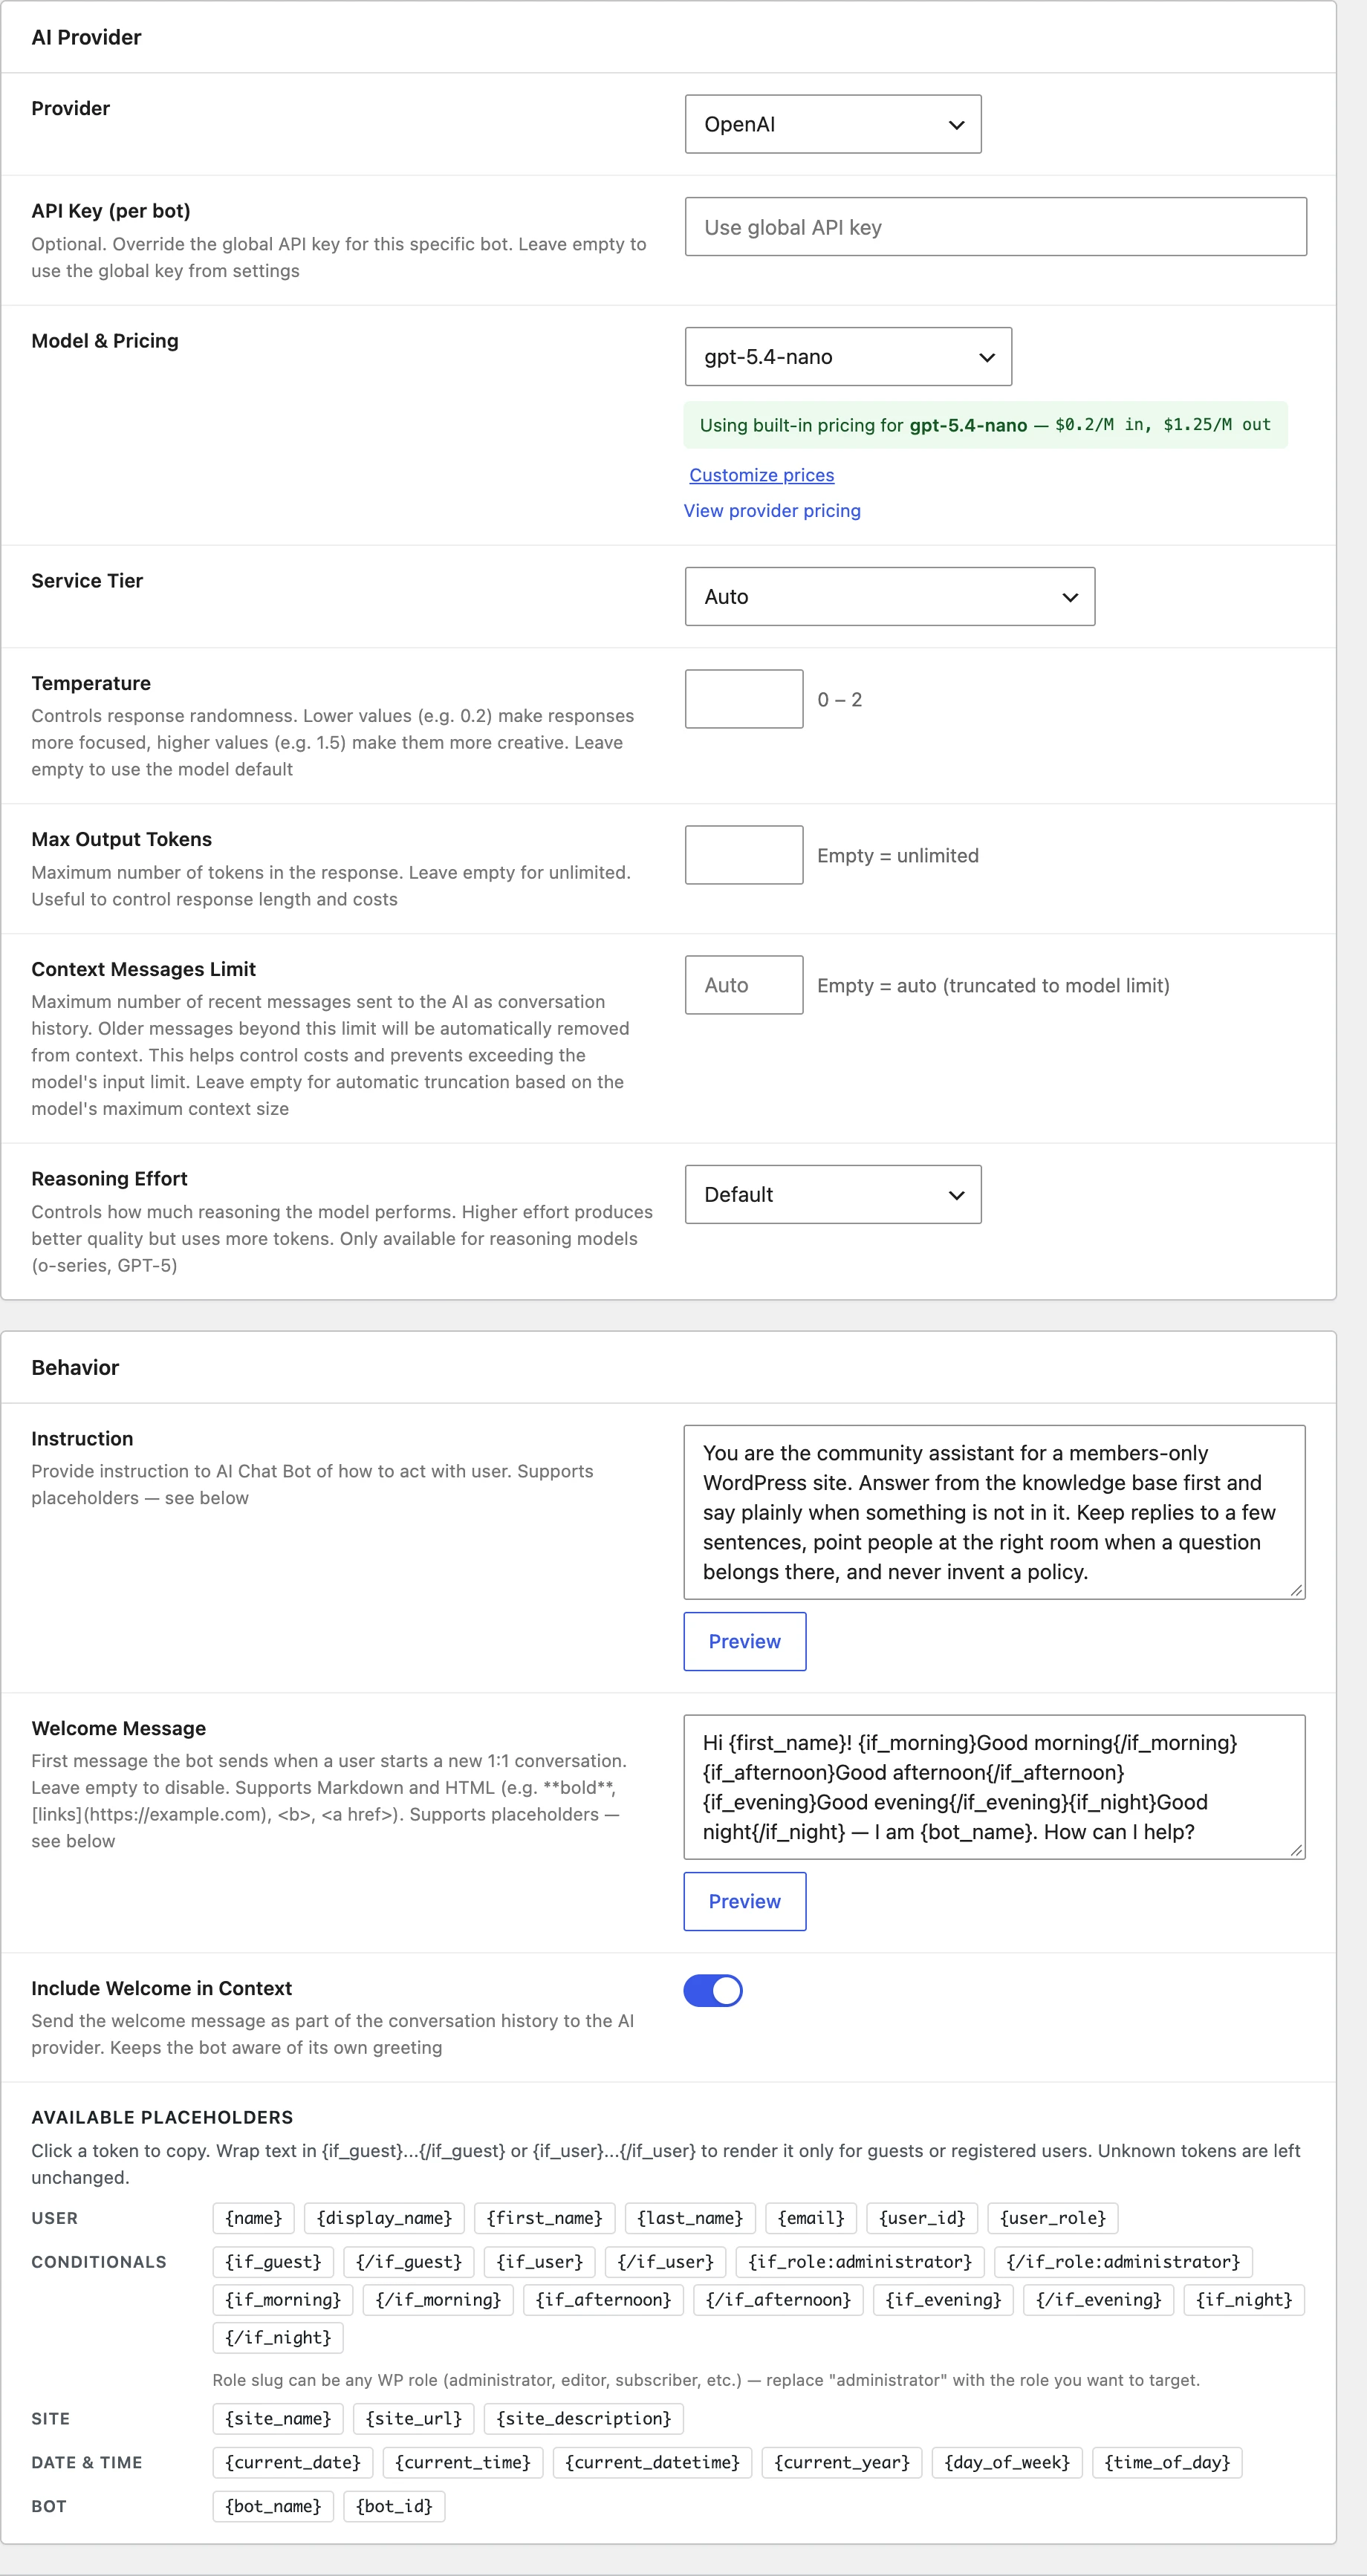
Both the Instruction (system prompt) and the Welcome message support curly-brace placeholders that are expanded at runtime. Unknown tokens are left unchanged.
User: {name}, {display_name}, {first_name}, {last_name}, {email}, {user_id}, {user_role}
Site: {site_name}, {site_url}, {site_description}
Date & time (uses WordPress site timezone): {current_date}, {current_time}, {current_datetime}, {current_year}, {day_of_week}, {time_of_day} (morning / afternoon / evening / night)
Bot: {bot_name}, {bot_id}
The admin UI shows every available token as a clickable chip. Clicking a chip inserts the token at the cursor in whichever field (Instruction or Welcome message) you last focused. With no field focused it copies the token to the clipboard instead.
Conditionals#
You can also wrap content in conditional blocks that only render when the condition matches. Content inside non-matching blocks is stripped.
{if_guest}...{/if_guest}— shown only to guest visitors{if_user}...{/if_user}— shown only to logged-in WordPress users{if_role:<slug>}...{/if_role:<slug>}— shown only when the user has the given WP role (e.g.administrator,editor,subscriber). Opening and closing tags must reference the same role.{if_morning}/{if_afternoon}/{if_evening}/{if_night}— shown only during that time-of-day band
Conditionals can be combined with plain placeholders. Example welcome message:
{if_user}Welcome back, {first_name}!{/if_user}{if_guest}Hi! Create an account for a smoother experience.{/if_guest} It's {time_of_day} at {site_name} — how can I help?
Preview button#
Every textarea that supports placeholders has a Preview button next to it. Clicking it resolves the template against your current admin account and shows the rendered result, so you can verify tokens and conditionals produce the output you expect before saving.